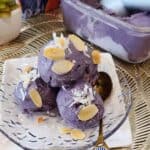
Homemade Ube Ice Cream
A smooth and flavorful ube ice cream recipe made from purple yam jam (ube halaya). No ice cream maker needed, you won’t believe it’s homemade!
Servings: 4 people
Calories: 315kcal
Ingredients
- 250 gr heavy cream
- 45 gr honey
- 100 gr ube halaya
- 85 gr condensed milk
- ½ tbsp ube paste
Instructions
- In a mixing bowl, whip the cold heavy cream until it forms soft peaks — you should see trails forming as you whisk. This step gives your ube ice cream its light and airy texture.
- Add ube halaya, honey, sweetened condensed milk, and ube paste or extract powder. Whisk until everything is smooth and evenly purple. The mixture should look silky and smell wonderfully nutty.
- Use a spatula to scrape the sides of the bowl and fold everything together until fully incorporated. This keeps the texture creamy without deflating the whipped cream.
- Transfer the mixture into an airtight container, smooth out the top, and cover with a lid or plastic wrap. Freeze overnight or at least 8 hours until firm. The next day, scoop and enjoy your homemade ube ice cream — no machine needed!
Notes
- Use cold cream. Make sure your heavy cream is well chilled before whipping. Cold cream traps air better, giving your ube ice cream that soft, fluffy texture without an ice cream maker.
- Whip just until soft peaks. Stop as soon as you see trails forming. Over-whipping will make the cream grainy and harder to fold with ube halaya.
- Adjust sweetness to taste. Different brands of ube halaya vary in sweetness. Start with less condensed milk and taste before adding more — you can always adjust before freezing.
- Enhance color and aroma. A few drops of ube extract or a bit of ube paste can really boost the color and flavor. The extract deepens the violet hue while keeping the nutty aroma intact.
- Fold gently. Use a spatula to fold the ube mixture into the whipped cream in slow, smooth motions. This helps preserve the air bubbles for that luscious, scoopable texture.
- Cover well before freezing. Air exposure can create ice crystals on top. Press a piece of cling wrap directly on the surface before sealing the container to keep your ice cream smooth.
- Let it sit before serving. If it’s too firm straight from the freezer, let it sit at room temperature for 5–10 minutes before scooping — this brings out the best creamy texture and flavor.
Nutrition
Serving: 1person | Calories: 315kcal | Carbohydrates: 23g | Protein: 3g | Fat: 24g | Saturated Fat: 16g | Polyunsaturated Fat: 1g | Monounsaturated Fat: 6g | Cholesterol: 78mg | Sodium: 44mg | Potassium: 144mg | Fiber: 0.02g | Sugar: 23g | Vitamin A: 975IU | Vitamin C: 1mg | Calcium: 102mg | Iron: 0.1mg