

Homemade Ube Ice Cream Recipe (No Machine Needed!)
 This post may contain affiliate links.
A smooth and flavorful Ube Ice Cream recipe made from purple yam jam (ube halaya). It’s perfectly creamy, with a beautiful color and nutty aroma that makes it hard to resist. No ice cream maker needed, you won’t believe it’s homemade!

A Quick Look at the Recipe
🏷️ Recipe Name: Ube Ice Cream
⏱️ Ready In: ~ 1 day 10 minutes
🍽️ Serves: 4 portions
🔥 Calories: 315 kcal per portion (estimate)
🧾 Main Ingredients: Ube halaya, heavy cream, condensed milk, honey, ube paste.
🥗 Dietary Info: Gluten free and contains dairy.
🧠 Difficulty: Very easy
Have a question? Ask AI!
Ube Ice Cream is a rich, creamy homemade dessert made with ube halaya for its signature nutty-vanilla flavor and vibrant purple color. This easy no-churn recipe doesn’t require an ice cream maker, making it perfect whenever you’re craving a scoop of homemade ice cream.
What makes this version extra special is the use of ube halaya, or Filipino purple yam jam. It gives the ice cream its rich flavor and velvety texture without the need for an ice cream maker. If you enjoy homemade frozen desserts like my Mango Ice Cream, you’ll love this creamy ube variation that’s as beautiful as it is delicious.
You should also try my Ube Mochi Pancakes or Ube Crinkle Cookies to enjoy this vibrant purple yam in even more delicious ways.
Why You Will Love This Recipe
Recipe Ingredients

Ingredient Notes
Heavy Cream – Use cold heavy cream or whipping cream with at least 35% fat for the best texture. The higher the fat, the smoother and creamier your ube ice cream will be. Avoid light cream or non-dairy creamer, they won’t whip as well or hold volume.
Ube Halaya (Purple Yam Jam) – This is the heart of the flavor. I always use my own homemade ube halaya for the richest, most authentic taste. You can use store-bought if that’s easier, but make sure it’s thick and not too sweet. The halaya gives this ube ice cream recipe its gorgeous color, nutty aroma, and creamy texture.
Sweetened Condensed Milk – Adds sweetness and that luscious mouthfeel without needing eggs or extra sugar. If you want to make it from scratch, try my Homemade Condensed Milk, it’s simple and so much better than canned!
Ube Extract or Ube Paste – Use this to deepen the color and boost the flavor. A small amount goes a long way. The extract gives your ice cream that signature violet hue and intensifies the nutty aroma.
How to Make Ube Ice Cream

STEP 1. Whip the cream. In a mixing bowl, whip the cold heavy cream until it forms soft peaks. You should see trails forming as you whisk (Images 1, 2). This step gives your ube ice cream its light and airy texture.
STEP 2. Add the ube goodness. Add ube halaya, honey, sweetened condensed milk, and ube paste or extract powder (Image 3). Whisk until everything is smooth and evenly purple (Image 4). The mixture should look silky and smell wonderfully nutty.
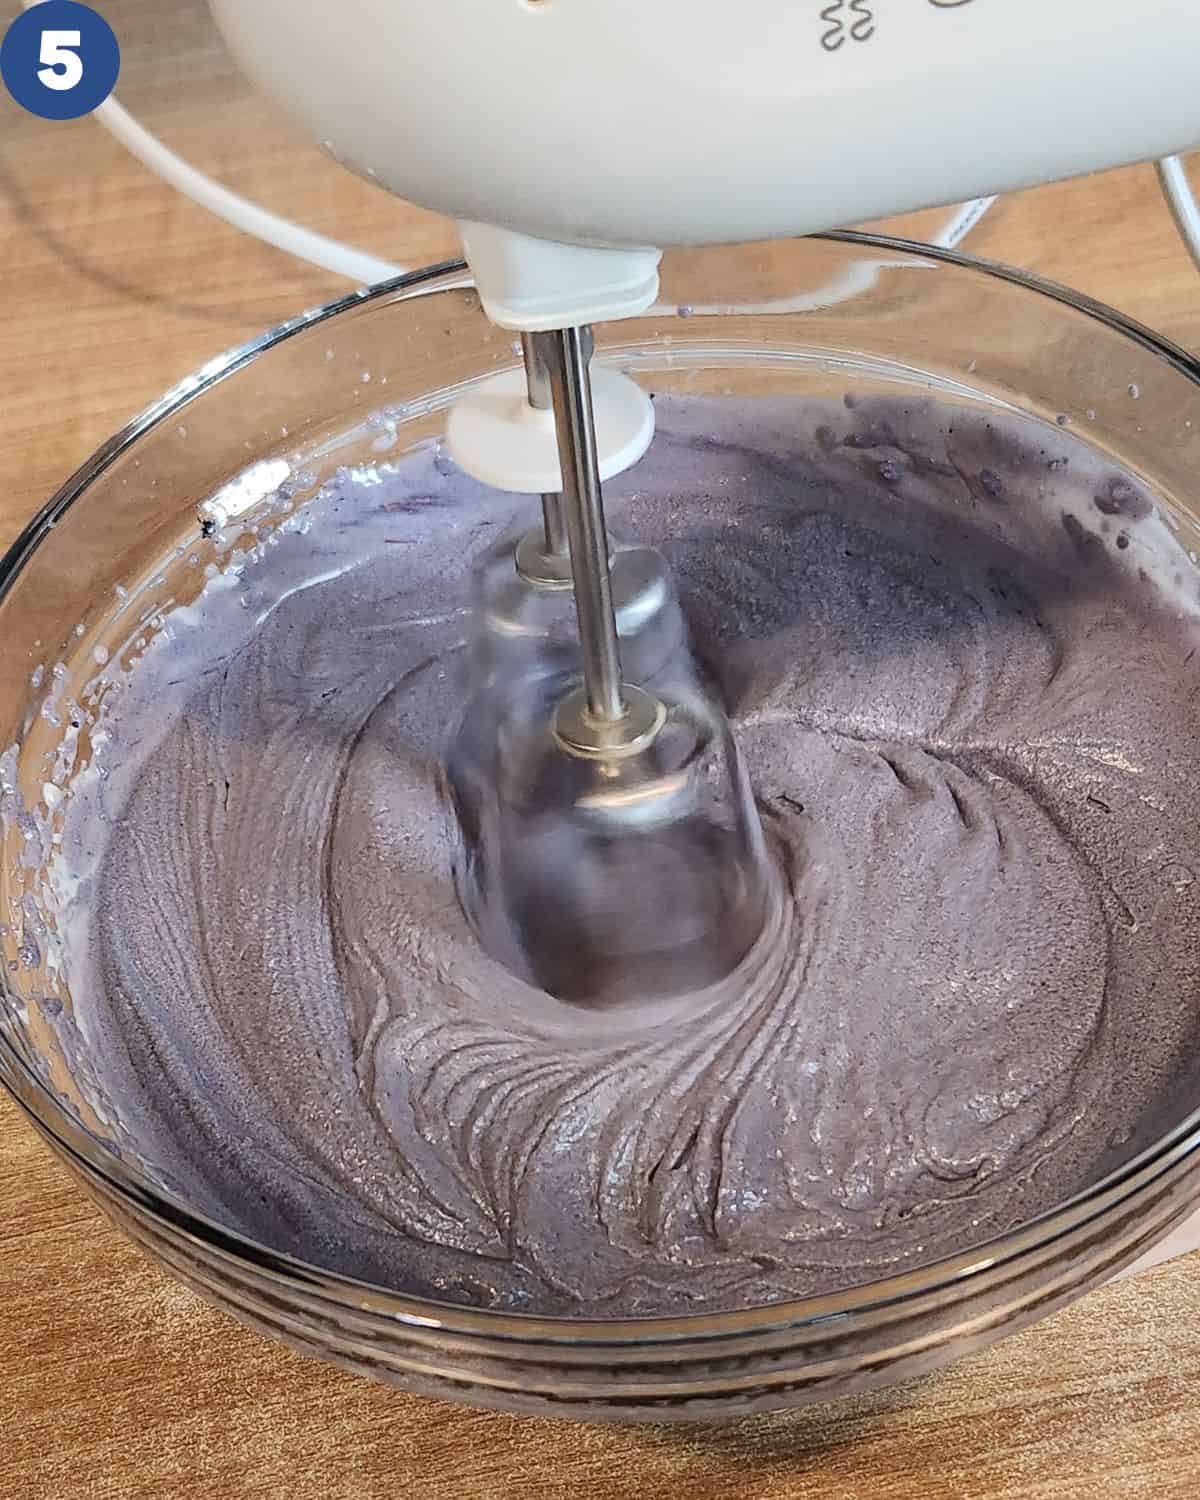

STEP 3. Fold and mix well. Use a spatula to scrape the sides of the bowl and fold everything together until fully incorporated (Image 5). This keeps the texture creamy without deflating the whipped cream.
STEP 4. Freeze to perfection. Transfer the mixture into an airtight container (Image 6), smooth out the top, and cover with a lid or plastic wrap. Freeze overnight or at least 8 hours until firm. The next day, scoop and enjoy your homemade ube ice cream!
Pro Tips
- Use cold cream – Make sure your heavy cream is well chilled before whipping. Cold cream traps air better, giving your ube ice cream that soft, fluffy texture without an ice cream maker.
- Whip just until soft peaks – Stop as soon as you see trails forming. Over-whipping will make the cream grainy and harder to fold with ube halaya.
- Adjust sweetness to taste – Different brands of ube halaya vary in sweetness. Start with less condensed milk and taste before adding more. You can always adjust before freezing.
- Enhance color and aroma – A few drops of ube extract or a bit of ube paste can really boost the color and flavor. The extract deepens the violet hue while keeping the nutty aroma intact.
- Fold gently – Use a spatula to fold the ube mixture into the whipped cream in slow, smooth motions. This helps preserve the air bubbles for that luscious, scoopable texture.
- Cover well before freezing – Air exposure can create ice crystals on top. Press a piece of cling wrap directly on the surface before sealing the container to keep your ice cream smooth.
- Let it sit before serving – If it’s too firm straight from the freezer, let it sit at room temperature for 5–10 minutes before scooping. This brings out the best creamy texture and flavor.
Serving Suggestions
Enjoy this creamy ube ice cream on its own and sprinkle some dried coconut and toasted almond slices. Drizzle golden syrup or osmanthus syrup on top of the ice cream. Or you can sandwich the ice cream between bread or wafers. It’s also lovely with a spoonful of my homemade strawberry compote for a bright fruity contrast.
Pair it with Matcha Chocolate Chip Cookies or Coffee Bean Cookies for a chewy contrast. For drinks, try it with Butterfly Pea Tea or a light Butterfly Pea Latte.
Ube Ice Cream Recipe FAQs
This ube ice cream recipe is made from simple ingredients — heavy cream, condensed milk, ube halaya (purple yam jam), and a little ube extract or paste for extra flavor and color. No eggs or machine needed!
Yes! Steam or boil the fresh ube until soft, then mash or blend it into a smooth paste. Mix it with condensed milk to mimic the texture of ube halaya before adding it to your cream.
Not at all, this is a no-churn ube ice cream recipe. The whipped cream creates the light, airy texture, so you can skip the machine and still get creamy, scoopable results.
It usually means the mixture wasn’t covered tightly, or the freezer is too cold. Next time, press cling wrap on top before sealing the container and let the ice cream sit out for a few minutes before scooping.

Storage
Keep your ube ice cream in an airtight container in the freezer for up to 1 month. To prevent ice crystals, press a piece of plastic wrap directly on the surface before sealing. When ready to serve, let it sit at room temperature for 5–10 minutes so it softens slightly and becomes perfectly scoopable again.
More Ube Desserts
- Ube Halaya (Filipino Purple Yam Jam)
- Ube Crinkle Cookies
- Ube Mochi Pancake
- Kuih Talam Ubi Ungu
- Putri Mandi

Homemade Ube Ice Cream
Ingredients
- 250 gr heavy cream
- 45 gr honey
- 100 gr ube halaya
- 85 gr condensed milk
- ½ tbsp ube paste
Instructions
- In a mixing bowl, whip the cold heavy cream until it forms soft peaks — you should see trails forming as you whisk. This step gives your ube ice cream its light and airy texture.
- Add ube halaya, honey, sweetened condensed milk, and ube paste or extract powder. Whisk until everything is smooth and evenly purple. The mixture should look silky and smell wonderfully nutty.
- Use a spatula to scrape the sides of the bowl and fold everything together until fully incorporated. This keeps the texture creamy without deflating the whipped cream.
- Transfer the mixture into an airtight container, smooth out the top, and cover with a lid or plastic wrap. Freeze overnight or at least 8 hours until firm. The next day, scoop and enjoy your homemade ube ice cream — no machine needed!
Notes
- Use cold cream. Make sure your heavy cream is well chilled before whipping. Cold cream traps air better, giving your ube ice cream that soft, fluffy texture without an ice cream maker.
- Whip just until soft peaks. Stop as soon as you see trails forming. Over-whipping will make the cream grainy and harder to fold with ube halaya.
- Adjust sweetness to taste. Different brands of ube halaya vary in sweetness. Start with less condensed milk and taste before adding more — you can always adjust before freezing.
- Enhance color and aroma. A few drops of ube extract or a bit of ube paste can really boost the color and flavor. The extract deepens the violet hue while keeping the nutty aroma intact.
- Fold gently. Use a spatula to fold the ube mixture into the whipped cream in slow, smooth motions. This helps preserve the air bubbles for that luscious, scoopable texture.
- Cover well before freezing. Air exposure can create ice crystals on top. Press a piece of cling wrap directly on the surface before sealing the container to keep your ice cream smooth.
- Let it sit before serving. If it’s too firm straight from the freezer, let it sit at room temperature for 5–10 minutes before scooping — this brings out the best creamy texture and flavor.


This ube ice cream turned out so creamy and smooth! I love how the ube halaya gives it that nutty, earthy flavor without being too sweet. It’s so easy to make — no ice cream maker needed, and it tastes just like the ones I used to enjoy back home! 💜