
Gluten-Free Fried Chicken with Tapioca Flour (Extra Crispy)
This gluten-free fried chicken uses tapioca flour instead of regular wheat flour to create a crispy coating with a light, crunchy texture. It is easy to make, naturally gluten-free, and perfect when you want simple fried chicken without traditional flour.

A Quick Look at the Recipe
🏷️ Recipe Name: Gluten-Free Fried Chicken with Tapioca Flour (Extra Crispy)
⏱️ Ready In: ~ 35 minutes
🍽️ Serves: 4 pieces
🔥 Calories: 646 kcal (per piece)
🧾 Main Ingredients: Chicken thigh fillet, salt, sugar, pepper, tapioca, water.
🥗 Dietary Info: Gluten free
🧠 Difficulty: Easy with guided steps.
Have a question? Ask AI!
This gluten-free fried chicken with tapioca flour creates a light, crispy coating without using regular wheat flour. The tapioca flour gives the chicken a delicate crunch while keeping the meat juicy and flavorful inside. It’s an easy recipe made with simple seasonings and perfect for anyone looking for a crispy fried chicken alternative.
If you enjoy fried chicken recipes, you may also love my flourless fried chicken, chicken rendang, chicken curry, or ayam balado (Indonesian spicy fried chicken). You can also browse more ideas in my Asian chicken recipes collection.
Why You Will Love This Recipe
Recipe Ingredients

Ingredient Notes
Tapioca flour – Tapioca flour creates a light, crispy coating without using wheat flour, making this fried chicken naturally gluten-free. It also gives the chicken a delicate crunch that stays crisp after frying.
Mushroom bouillon powder – This optional ingredient adds a deeper savory flavor and extra umami to the chicken. If you do not have it, the recipe will still taste delicious.
Chicken – Bone-in chicken pieces work especially well because they stay juicy while developing a flavorful golden crust.
Be sure to check out the full recipe and ingredient list below
How to Make Gluten Free Fried Chicken

STEP 1. Mix salt, sugar, mushroom powder, pepper, water and tapioca flour into a big container enough to marinate the chicken (Image 1). Stir well (Image 2). Put in the chicken thigh (Image 3). Marinate the chicken well until all sides are thoroughly coated (Image 4). Set aside for 10 minutes.

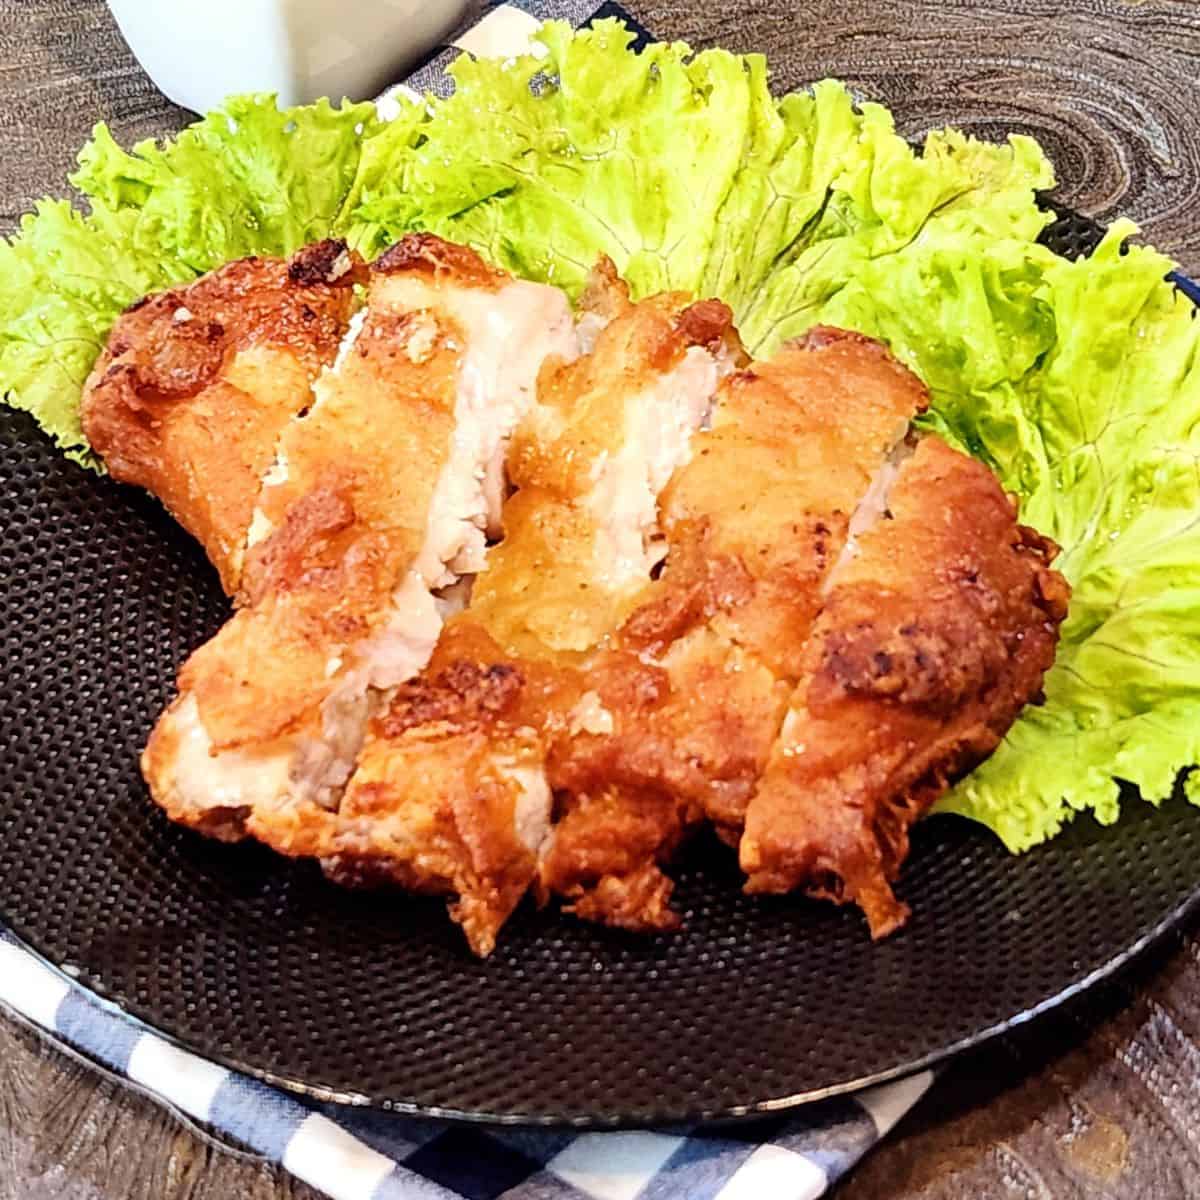
STEP 2. Heat enough oil in a pan for deep frying. Dip a bamboo stick or chopstick into it to test if the oil is hot enough (Image 5). If bubbles appear around it, the oil is hot enough. Carefully add the chicken (Image 6). Let one side fry for 5 to 6 minutes before flipping it. Fry until the color turns golden brown (Images 7, 8). Drain the chicken and let it cool before cutting them into slices. Enjoy!
Pro Tips
- Test the oil before frying – Dip a bamboo skewer into the oil before adding the chicken. If small bubbles form around the skewer, the oil is hot enough for frying.
- Gently poke the chicken while frying – Lightly poke thicker pieces with a bamboo skewer during cooking. This can help release trapped steam and encourage the chicken to cook more evenly toward the center.
- Double fry for extra crispiness – For a crunchier coating, fry the chicken once until cooked through, let it rest for about 1 minute, then fry it again for 30–45 seconds. The second fry helps create a crispier exterior.
- Add rice flour for a crispier coating (optional) – Mix 1 tablespoon of rice flour into the tapioca coating if you prefer a lighter, crunchier texture that stays crispy longer.
Serving Suggestions
Serve with comforting Indonesian dishes – This Indonesian gluten-free fried chicken pairs wonderfully with warm steamed rice and comforting dishes like sop buntut (Indonesian oxtail soup) and flavorful dishes like fish curry or beef rendang for a satisfying family-style meal.
Add vegetables for balance – Complete the meal with vegetable side dishes like garlic green beans or chicken with kikurage mushroom and cauliflower for extra texture and freshness.
Finish with gluten-free Indonesian desserts – End the meal with naturally gluten-free treats like ongol ongol, klepon, or candil ubi for something sweet and comforting.
Pair with warm or refreshing drinks – Enjoy it with wedang jahe (Indonesian ginger tea) on cooler days or lemongrass tea for a lighter, refreshing option.
Gluten-free Fried Chicken FAQs
This recipe uses tapioca flour instead of wheat flour to create a crispy coating without regular flour. Tapioca flour is naturally gluten-free and gives the chicken a light, delicate crunch.
Use a neutral oil with a high smoke point, such as vegetable oil, canola oil, peanut oil, or coconut oil. These oils help the chicken fry evenly and develop a crisp golden coating.
Yes. Lightly spray the chicken with oil before cooking.
Air fryer: Cook at 375°F (190°C) for 20–25 minutes, flipping halfway through.
Oven: Bake at 400°F (200°C) for 25–30 minutes, turning once, until golden and cooked through.
Yes. Tapioca flour is made from cassava root and is naturally gluten-free. Just check the package if you have severe gluten sensitivity to make sure there is no cross-contamination.
The oil may not have been hot enough, or the pan may have been overcrowded. Frying in batches and keeping the oil temperature consistent helps create a crispier coating.
Tapioca flour creates a light, thin coating that becomes crisp when fried. It also absorbs less moisture than regular wheat flour, helping the chicken stay crunchy while keeping the meat juicy.

Storage and Reheating
Store leftovers in an airtight container in the refrigerator for up to 3 days. To reheat and maintain crispiness:
- Air-fryer: Reheat at 350°F (175°C) for 5-7 minutes.
- Oven: Bake at 350°F (175°C) for 10-15 minutes.


Gluten-Free Fried Chicken with Tapioca Flour (Extra Crispy)
Equipment
- 1 wok
- 1 air fryer
Ingredients
- 1 kg chicken thigh fillet
- 11 g salt
- 15 g sugar
- 8 g mushroom bouillon powder
- 1 tsp pepper
- 80 g water
- 100 g tapioca flour
Instructions
- Mix salt, sugar, mushroom powder, pepper, water and tapioca flour into a big container enough to marinate the chicken. Stir well. Put in the chicken thigh. Marinate the chicken well until all sides are thoroughly coated. Set aside for 10 minutes.
- Heat enough oil in a pan for deep frying. Dip a bamboo stick or chopstick into it to test if the oil is hot enough. If bubbles appear around it, the oil is hot enough. Carefully add the chicken. Let one side fry for 5 to 6 minutes before flipping it. Fry until the color turns golden brown. Drain the chicken and let it cool before cutting them into slices. Enjoy!
Video
Notes
- Before adding the chicken, test the oil temperature with a bamboo skewer. If you see small bubbles forming around the skewer, the oil is ready for frying.
- While frying, gently poke the chicken with a bamboo skewer. This helps release steam from inside the meat, and it helps to cook to the center without overcooking the outside.
- For an even crispier texture, use a double-fry method. After the first frying, let the chicken drain and rest for a minute. Then return it to the hot oil for about 45 seconds. This makes the fried chicken even crispier.
- For a lasting, extra-crispy coating, add one tablespoon of rice flour to your tapioca batter. It creates a lighter, crispier texture that stays crunchy longer.


Love this crispy fried chicken for its simplicity! It is super quick to serve and you will love it!