

Kimchi Fried Rice Recipe with Beef (Easy & Delicious)
 This post may contain affiliate links.
If you love Korean food, you have to try this Kimchi Fried Rice Recipe! It’s packed with savory beef slices, tangy kimchi, and rice, all stir-fried together for a delicious, flavorful meal. Top it with a fried egg, sesame seeds, and crispy seaweed, and you’ve got a satisfying meal that’s surprisingly easy to make at home!

A Quick Look at the Recipe
🏷️ Recipe Name: Kimchi Fried Rice
⏱️ Ready In: ~ 10 minutes
🍽️ Serves: 1 portion
🔥 Calories: 1189 kcal per portion (estimate)
🧾 Main Ingredients: Leftover rice, beef slices, kimchi, garlic, gochujang, soy sauce, pepper, mushroom powder, green onion, sesame oil.
🥗 Dietary Info: Contains meat.
🧠 Difficulty: Easy with simple step-by-step guide.
Have a question? Ask AI!
If you have leftover rice and want to turn it into something delicious, try this Kimchi Fried Rice Recipe! This easy kimchi fried rice is packed with savory flavors and a little tanginess from the kimchi. I added tender beef slices and topped it with a sunny-side-up egg, crispy nori seaweed, and sesame seeds. It’s an easy, satisfying meal that’s perfect for breakfast, lunch, or dinner!
For more delicious Korean dishes, try my Korean Beef Radish Soup, a comforting, savory soup that’s perfect for a cozy meal. You can also enjoy my Korean Strawberry Milk, a sweet and refreshing homemade drink that’s so easy to make!
Why You Will Love This Recipe
Recipe Ingredients
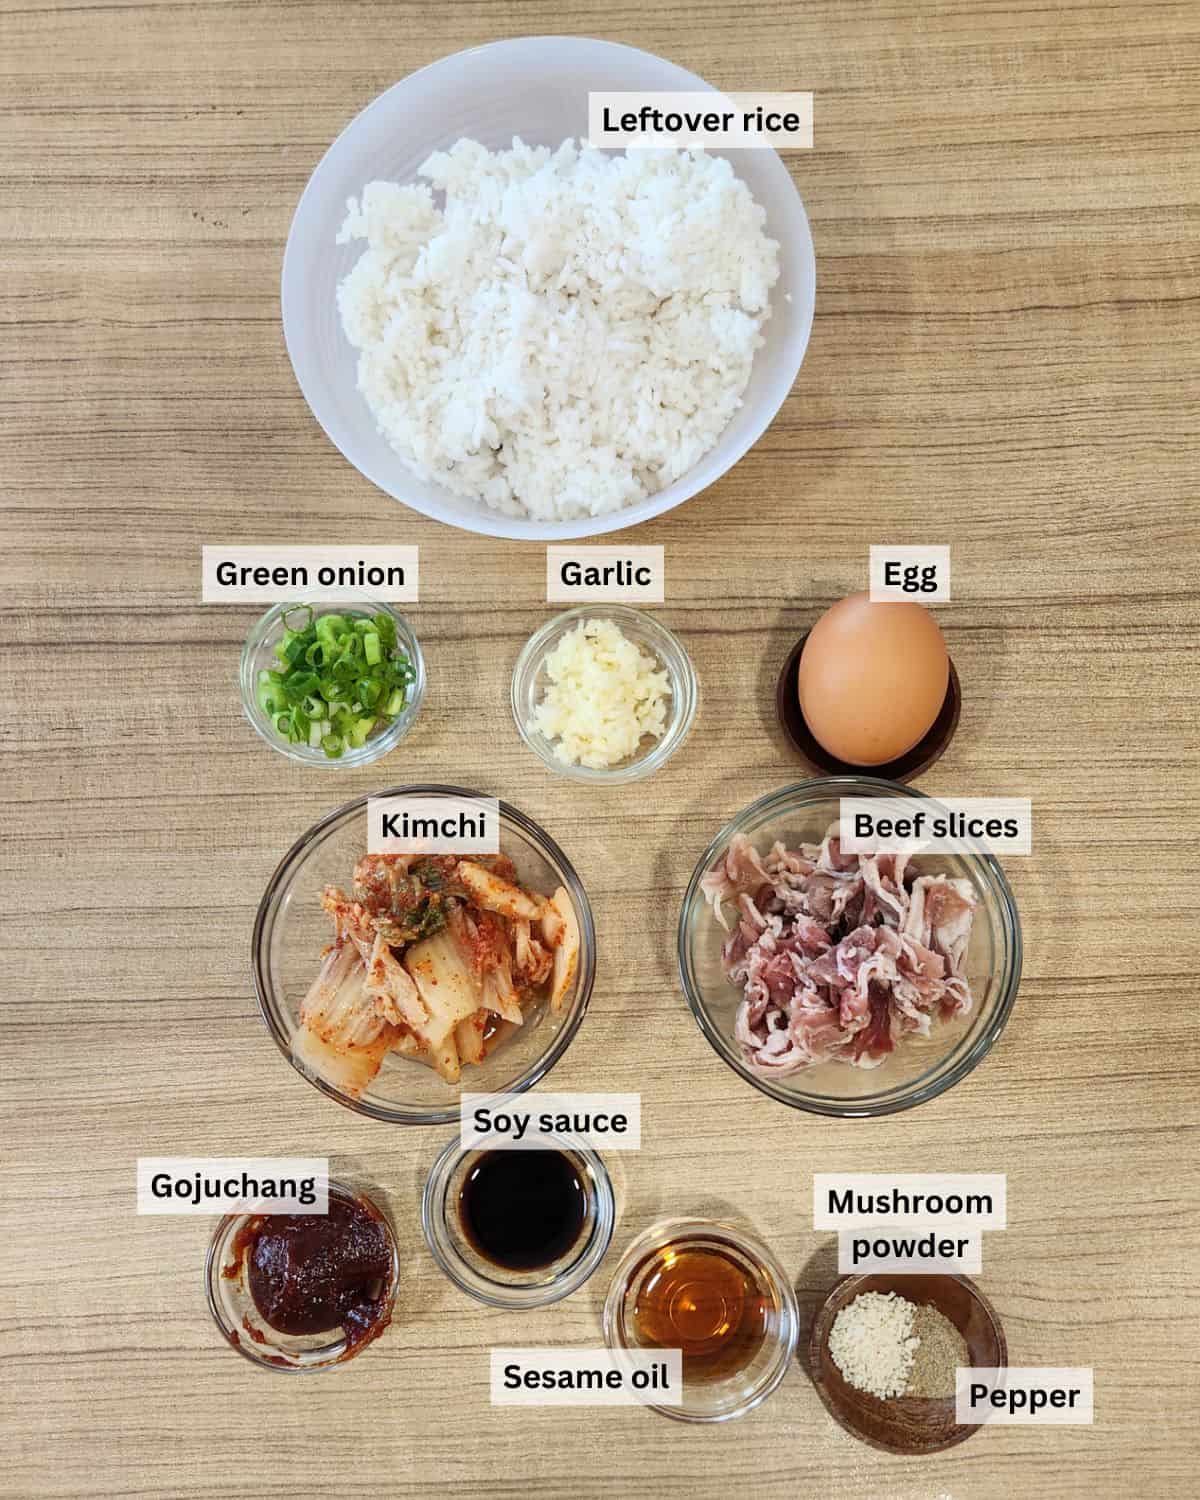
Ingredients Notes
- Leftover Rice. Day-old rice works best for kimchi fried rice because it’s slightly drier and less likely to become mushy when stir-fried.
- Kimchi. Use well-fermented kimchi for the best flavor. The longer it ferments, the tangier and more flavorful it becomes. Slightly sour, aged kimchi is especially good for fried rice.
- Beef Slices. I use thinly sliced beef for this recipe, but you can substitute it with Spam, pork, chicken, shrimp, or your favorite protein.
- Gochujang. This Korean red chili paste is a key ingredient that gives the fried rice its rich, spicy, savory flavor. You can find gochujang on Amazon.
How to Make Kimchi Fried Rice

STEP 1. Heat some cooking oil in a wok or large frying pan over medium heat. Add the minced garlic (Image 1) and sauté until lightly golden and fragrant. Add the beef slices (Image 2) and stir-fry until they change color and are almost cooked through.
Crack in the egg (Image 3) and scramble it until just set. Push the beef and egg to one side of the wok, then add the leftover rice and kimchi (Image 4).

STEP 2. Add the gochujang, soy sauce, sesame oil, mushroom powder, and pepper (Images 5, 6). Stir-fry everything together, breaking up any clumps of rice, until the rice is evenly coated with the seasonings.
Lastly, add the chopped green onions (Image 7) and stir-fry briefly until everything is heated through and the beef is fully cooked (Image 8). Serve hot, topped with a sunny-side-up egg, shredded nori seaweed, and a sprinkle of toasted sesame seeds!
Pro Tips
- Use day-old rice. Cold, leftover rice works best because it’s slightly drier and less sticky. This helps prevent the fried rice from becoming mushy.
- Choose well-fermented kimchi. Slightly sour, aged kimchi adds a deeper, tangier flavor to the fried rice. Fresh kimchi won’t give you quite the same rich flavor.
- Don’t overcook the beef. Thinly sliced beef cooks quickly, so stir-fry it just until it changes color. It will continue cooking when you add the rice and seasonings.
- Break up the rice clumps. Use your spatula to separate any clumps of rice while stir-frying. This helps the rice cook evenly and absorb the seasonings.
- Adjust the spiciness. Add more or less gochujang depending on your preference. Start with a smaller amount if you prefer a milder flavor.
- Add green onions last. Stir in the chopped green onions toward the end of cooking to keep their fresh flavor and aroma.

Serving Suggestions
Serve this kimchi fried rice hot, topped with a sunny-side-up egg, shredded nori seaweed, and a sprinkle of toasted sesame seeds.
Pair it with crispy Korean Shrimp Toast (Menbosha) or Fried Shrimp Balls for a delicious appetizer. You can also serve it with a bowl of Egg Drop Soup for a comforting meal.
For something lighter, try Bok Choy Stir Fry or Green Beans with Garlic. Complete your meal with a refreshing glass of Lychee Tea or Pineapple Mint Soda to balance the savory and spicy flavors of the kimchi fried rice.
Kimchi Fried Rice FAQs
Yes! Although day-old rice works best, you can use freshly cooked rice. Spread the rice in a thin layer on a tray to release excess steam, then place it in the freezer for about 10–15 minutes to cool quickly. Check that the rice has cooled and the surface is less moist before stir-frying.
Well-fermented, slightly sour napa cabbage kimchi works best. It has a deeper, tangier flavor that makes the fried rice more delicious.
Yes, you can! Although gochujang adds a delicious spicy and savory flavor, you can leave it out. Add a little extra kimchi or kimchi juice for more flavor, and adjust the seasonings to taste.
Absolutely! You can substitute the beef slices with chicken, pork, Spam, shrimp, or tofu. Just make sure your chosen protein is thoroughly cooked.
It depends on the kimchi and the amount of gochujang you use. For a milder version, reduce the gochujang. If you love spicy food, add more gochujang or a little Korean chili flakes (gochugaru).

Storage
Store leftover kimchi fried rice in an airtight container in the refrigerator for up to 3 days. Let it cool quickly and refrigerate promptly.
To reheat: Microwave until steaming hot, or reheat in a frying pan over medium heat with a splash of water to prevent the rice from drying out. Stir occasionally until heated through.
For the best taste and texture, prepare a fresh sunny-side-up egg when serving.
More Fried Rice Recipes
Love fried rice? Here are more delicious Asian fried rice recipes you can easily make at home!
- Pineapple Shrimp Fried Rice – A delicious combination of juicy shrimp, sweet pineapple, and savory fried rice.
- Shrimp and Chicken Fried Rice – A satisfying fried rice packed with tender chicken, shrimp, and flavorful seasonings.
- Indonesian Fried Rice (Nasi Goreng) – A popular Indonesian favorite with a delicious balance of sweet and savory flavors.
- Egg Fried Rice – A quick and easy fried rice recipe made with simple ingredients, perfect for busy days.
Love fried rice? Explore my Fried Rice Recipes collection for more delicious Asian favorites, including Indonesian nasi goreng, pineapple shrimp fried rice, and more!

Kimchi Fried Rice
Equipment
- 1 wok
Ingredients
- 250 g rice leftover from the refrigerator
- 80 g beef slices
- 2 garlic cloves
- 100 g kimchi
- 1 egg
- 1 tbsp gochujang
- 1 tsp soy sauce
- ½ tsp pepper
- 2 tsp sesame oil
Instructions
- Heat some cooking oil in a wok or large frying pan over medium heat. Add the minced garlic and sauté until lightly golden and fragrant. Add the beef slices and stir-fry until they change color and are almost cooked through.
- Crack in the egg and scramble it until just set. Push the beef and egg to one side of the wok, then add the leftover rice and kimchi.
- Add the gochujang, soy sauce, sesame oil, mushroom powder, and pepper. Stir-fry everything together, breaking up any clumps of rice, until the rice is evenly coated with the seasonings.
- Lastly, add the chopped green onions and stir-fry briefly until everything is heated through and the beef is fully cooked. Serve hot, topped with a sunny-side-up egg, shredded nori seaweed, and a sprinkle of toasted sesame seeds!
Notes
- Use day-old rice. Cold, leftover rice works best because it’s slightly drier and less sticky. This helps prevent the fried rice from becoming mushy.
- Choose well-fermented kimchi. Slightly sour, aged kimchi adds a deeper, tangier flavor to the fried rice. Fresh kimchi won’t give you quite the same rich flavor.
- Don’t overcook the beef. Thinly sliced beef cooks quickly, so stir-fry it just until it changes color. It will continue cooking when you add the rice and seasonings.
- Break up the rice clumps. Use your spatula to separate any clumps of rice while stir-frying. This helps the rice cook evenly and absorb the seasonings.
- Adjust the spiciness. Add more or less gochujang depending on your preference. Start with a smaller amount if you prefer a milder flavor.
- Add green onions last. Stir in the chopped green onions toward the end of cooking to keep their fresh flavor and aroma.


I love how simple this easy kimchi fried rice is to make! It’s packed with savory flavors and makes a delicious, satisfying meal for breakfast, lunch, or dinner.