
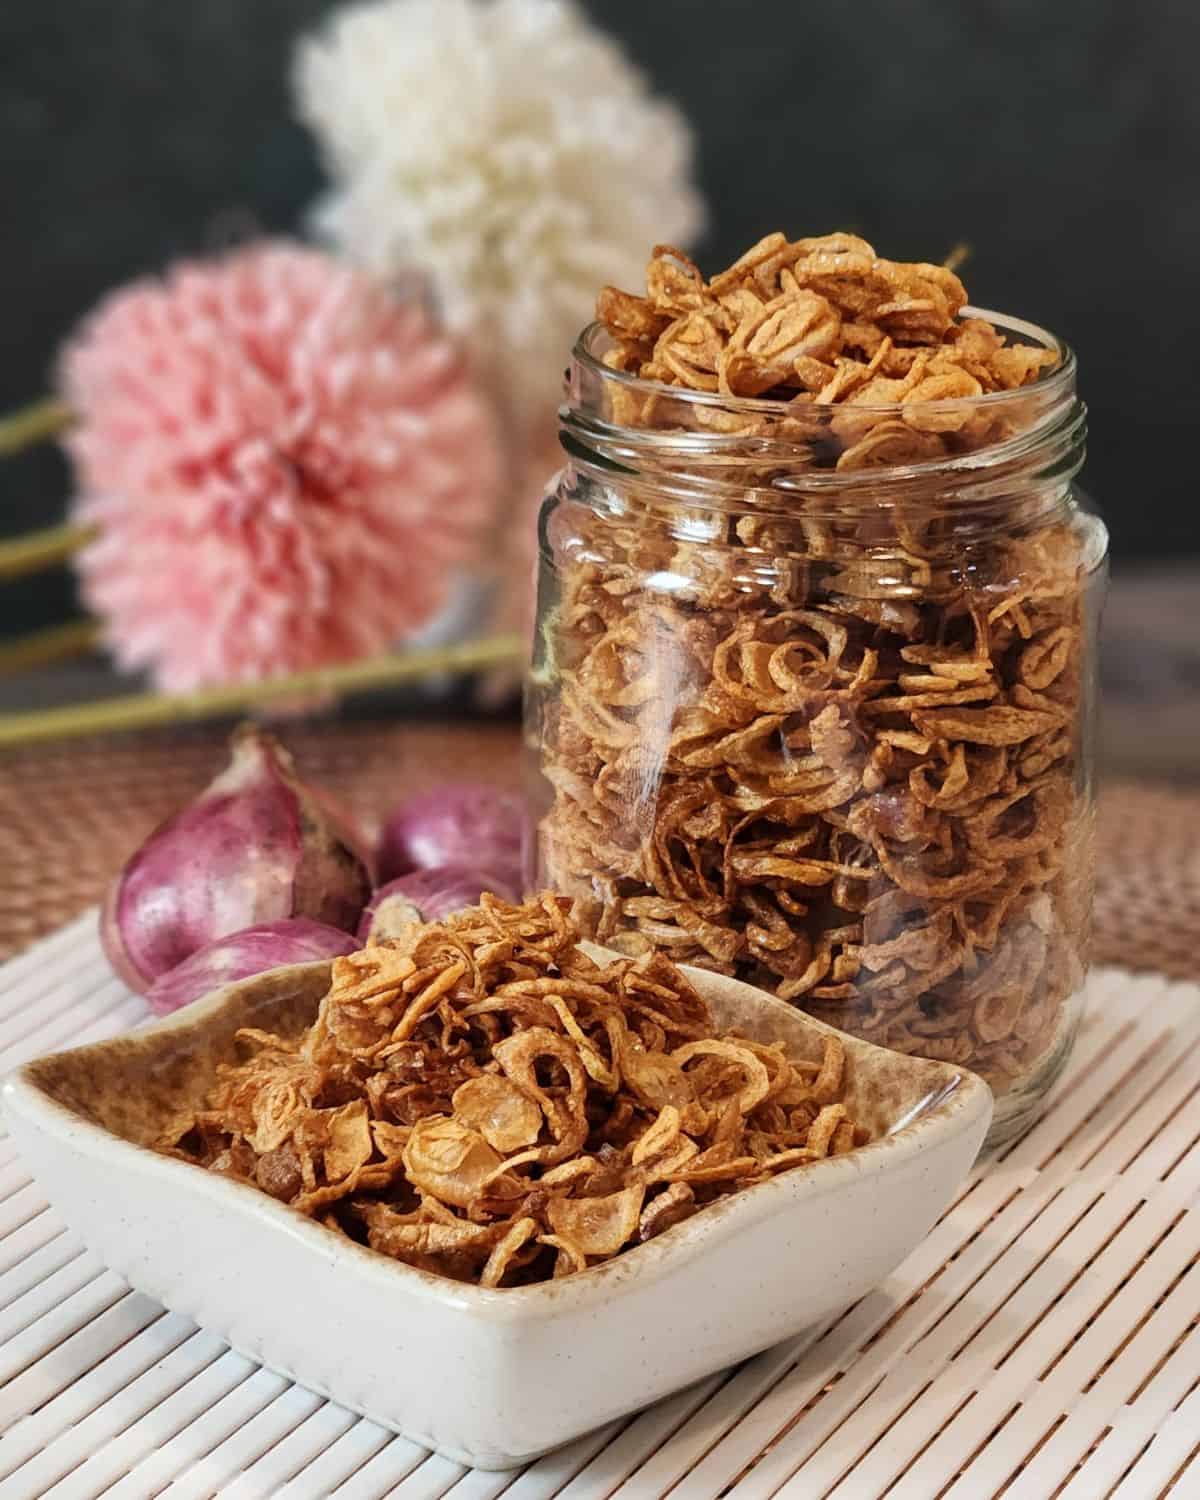
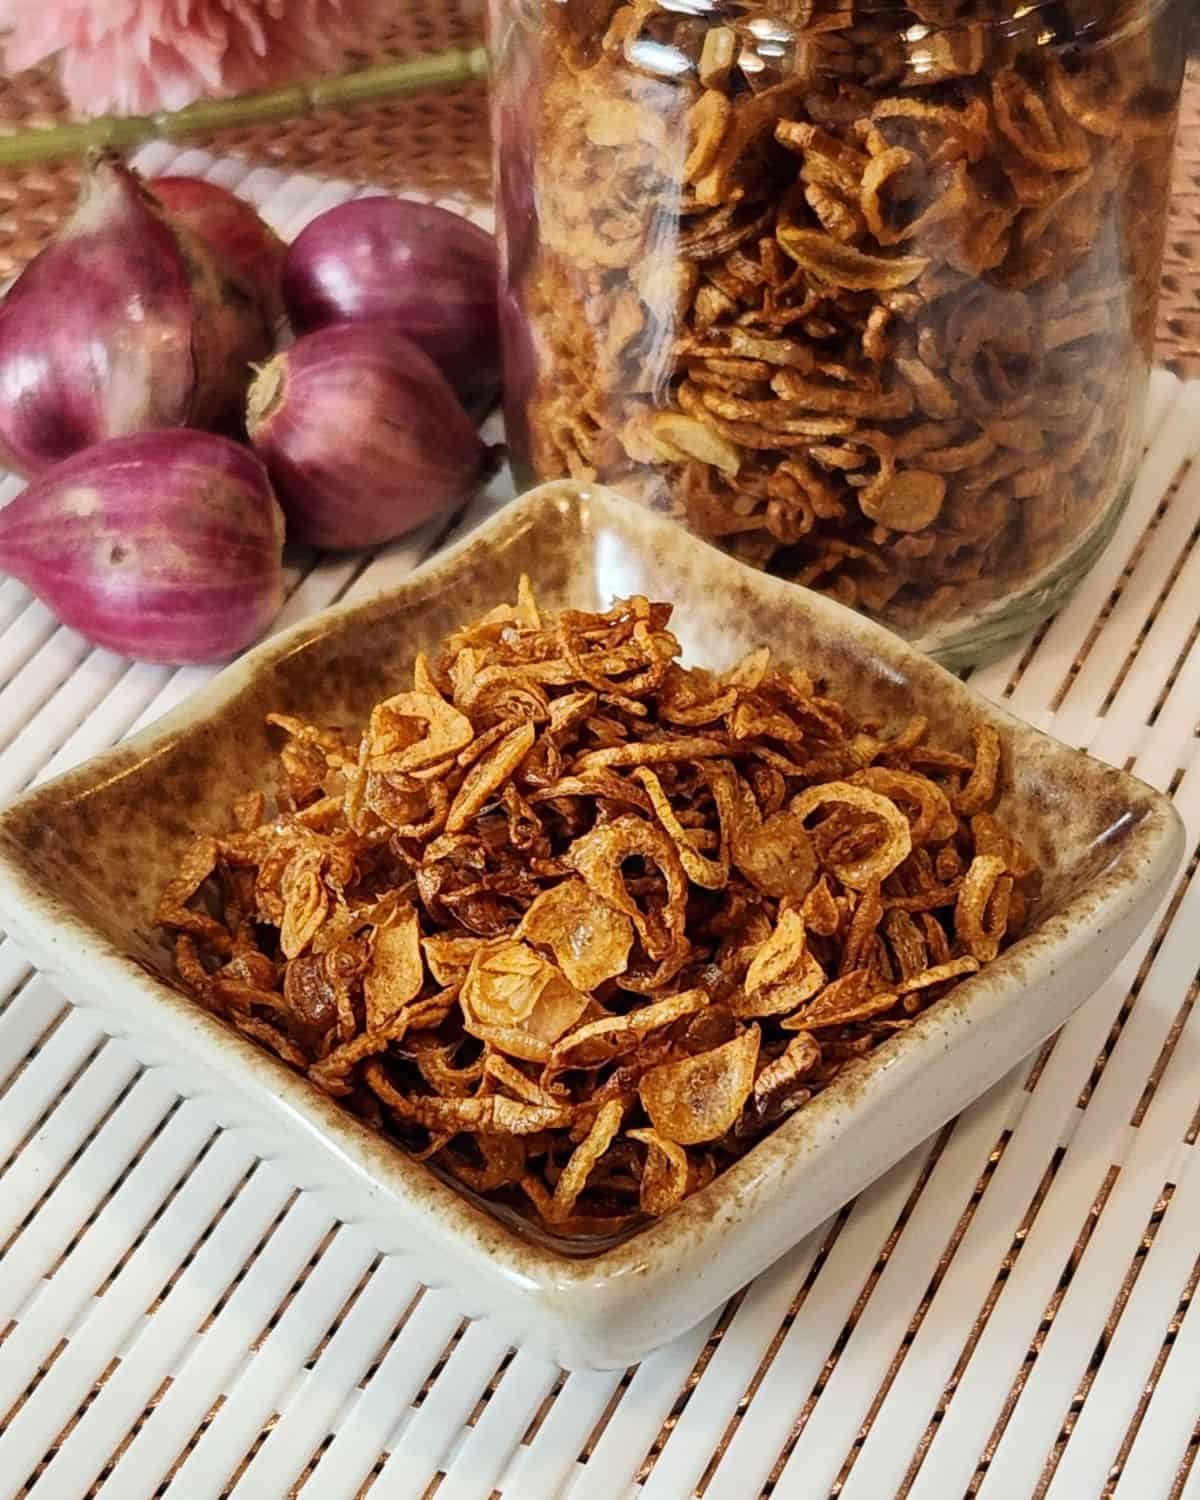
How to Make Crispy Fried Shallots / Bawang Goreng
There’s something about crispy fried shallots, known as bawang goreng, that instantly brings back the smell of busy kitchens and comforting home-cooked meals. These thin, golden flakes add crunch, aroma, and that signature Indonesian flavor to so many dishes. If you’ve ever wondered how to make your own batch that stays crispy for weeks, you’re in the right place.
A Quick Look at the Recipe
🏷️ Recipe Name: Crispy Fried Shallots / Bawang Goreng
⏱️ Ready In: ~ 30 minutes
🍽️ Serves: 50 teaspoons
🔥 Calories: 7 kcal (per serving)
🧾 Main Ingredients: Shallots, vinegar, salt
🥗 Dietary Info: Halal
🧠 Difficulty: Easy, very simple steps.
Have a question? Ask AI!
Crispy fried shallots or bawang goreng are the secret weapon behind so many comforting Indonesian dishes. These tiny golden flakes add crunch, aroma, and that irresistible savory punch to everything from chicken curry to mie goreng.
The best part of homemade fried shallots? You only need a few ingredients: shallots, oil, and a sprinkle of salt… but technique is everything. In this guide, I’ll walk you through exactly how to slice, fry, and store them so they stay crunchy for weeks. I’ll also show you where to use them across your favorite Indonesian recipes, because once you start making your own, you’ll never look at the store-bought version the same way again.
I actually make fried shallots at home all the time because the store-bought version never hits the same. Most brands use palm oil, which makes the bawang goreng taste heavy and greasy, and sometimes they mix in flour or other fillers, definitely not the pure, clean shallot flavor we love. Some even turn dark too quickly or go rancid fast. When I fry my own using coconut oil, the result is lighter, cleaner, and wonderfully crisp.
Just like my homemade pickled cucumber (acar timun) and scallion oil, crispy fried shallots are one of those kitchen essentials that instantly make any dish taste “complete.” Once you get the hang of making them yourself, you’ll always want a fresh jar within reach, ready to sprinkle on noodle dishes, soups, or anything that needs a boost.
Why You Will Love This Recipe
Recipe Ingredients
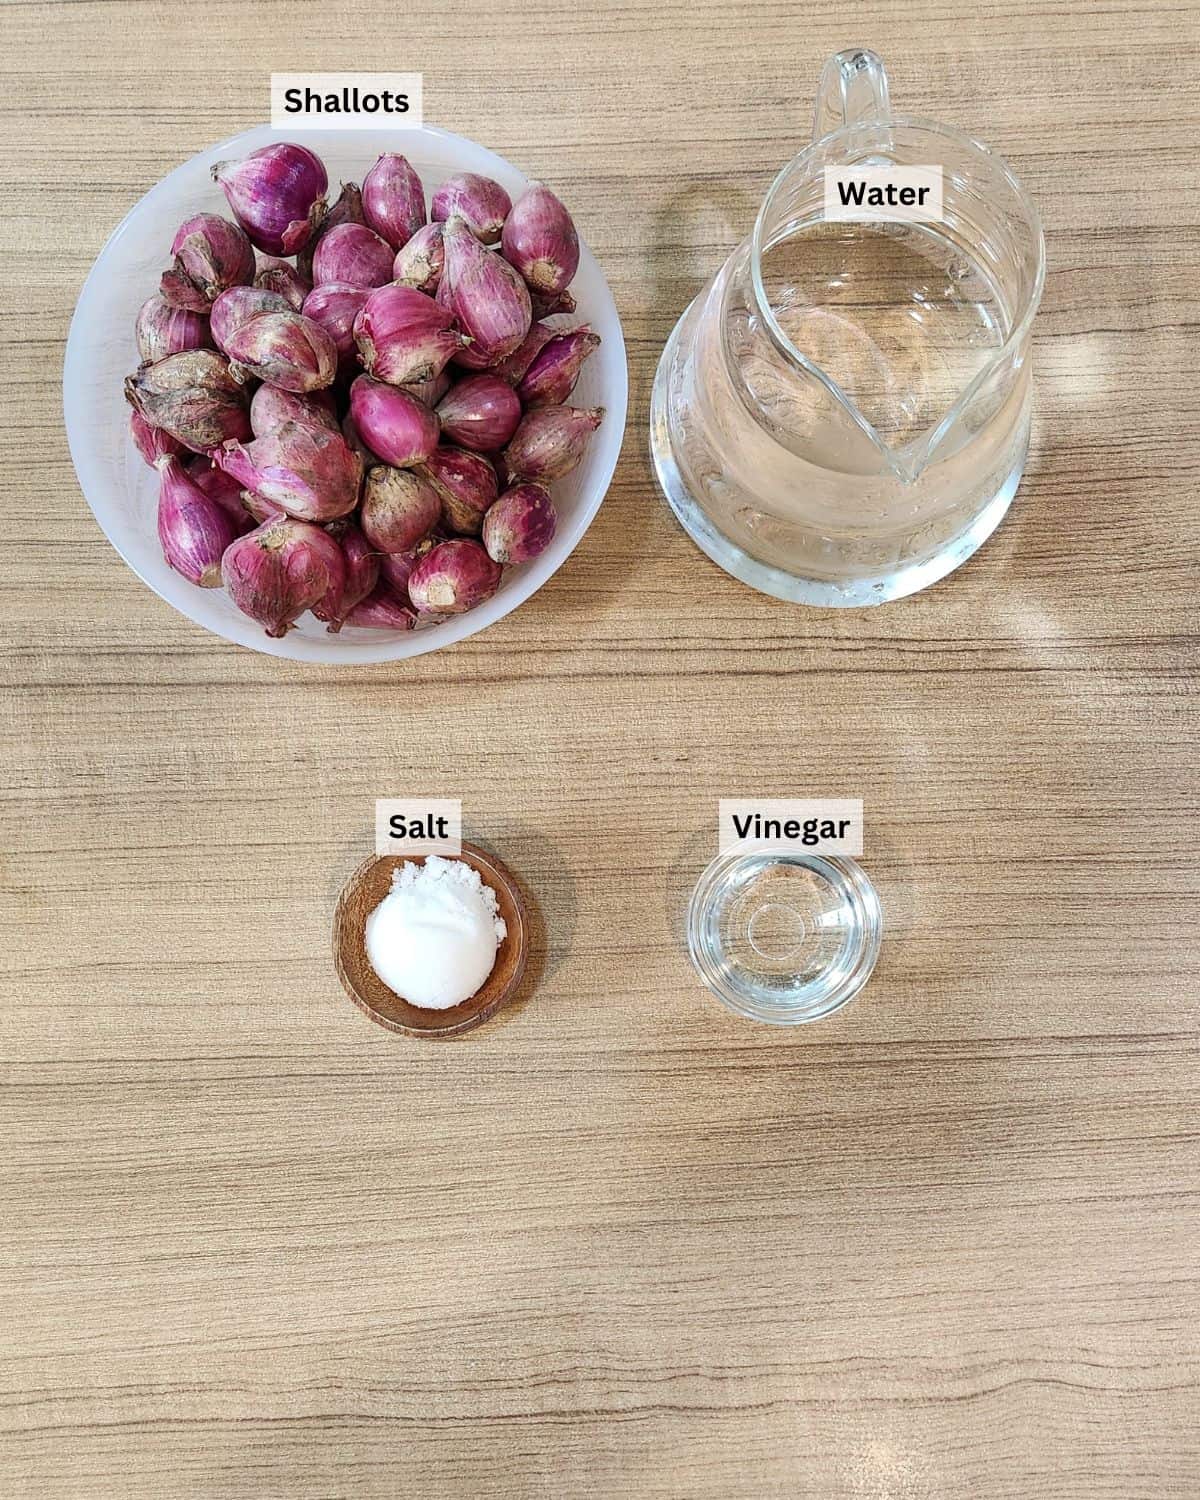
Ingredient Notes
How to Make Crispy Fried Shallots
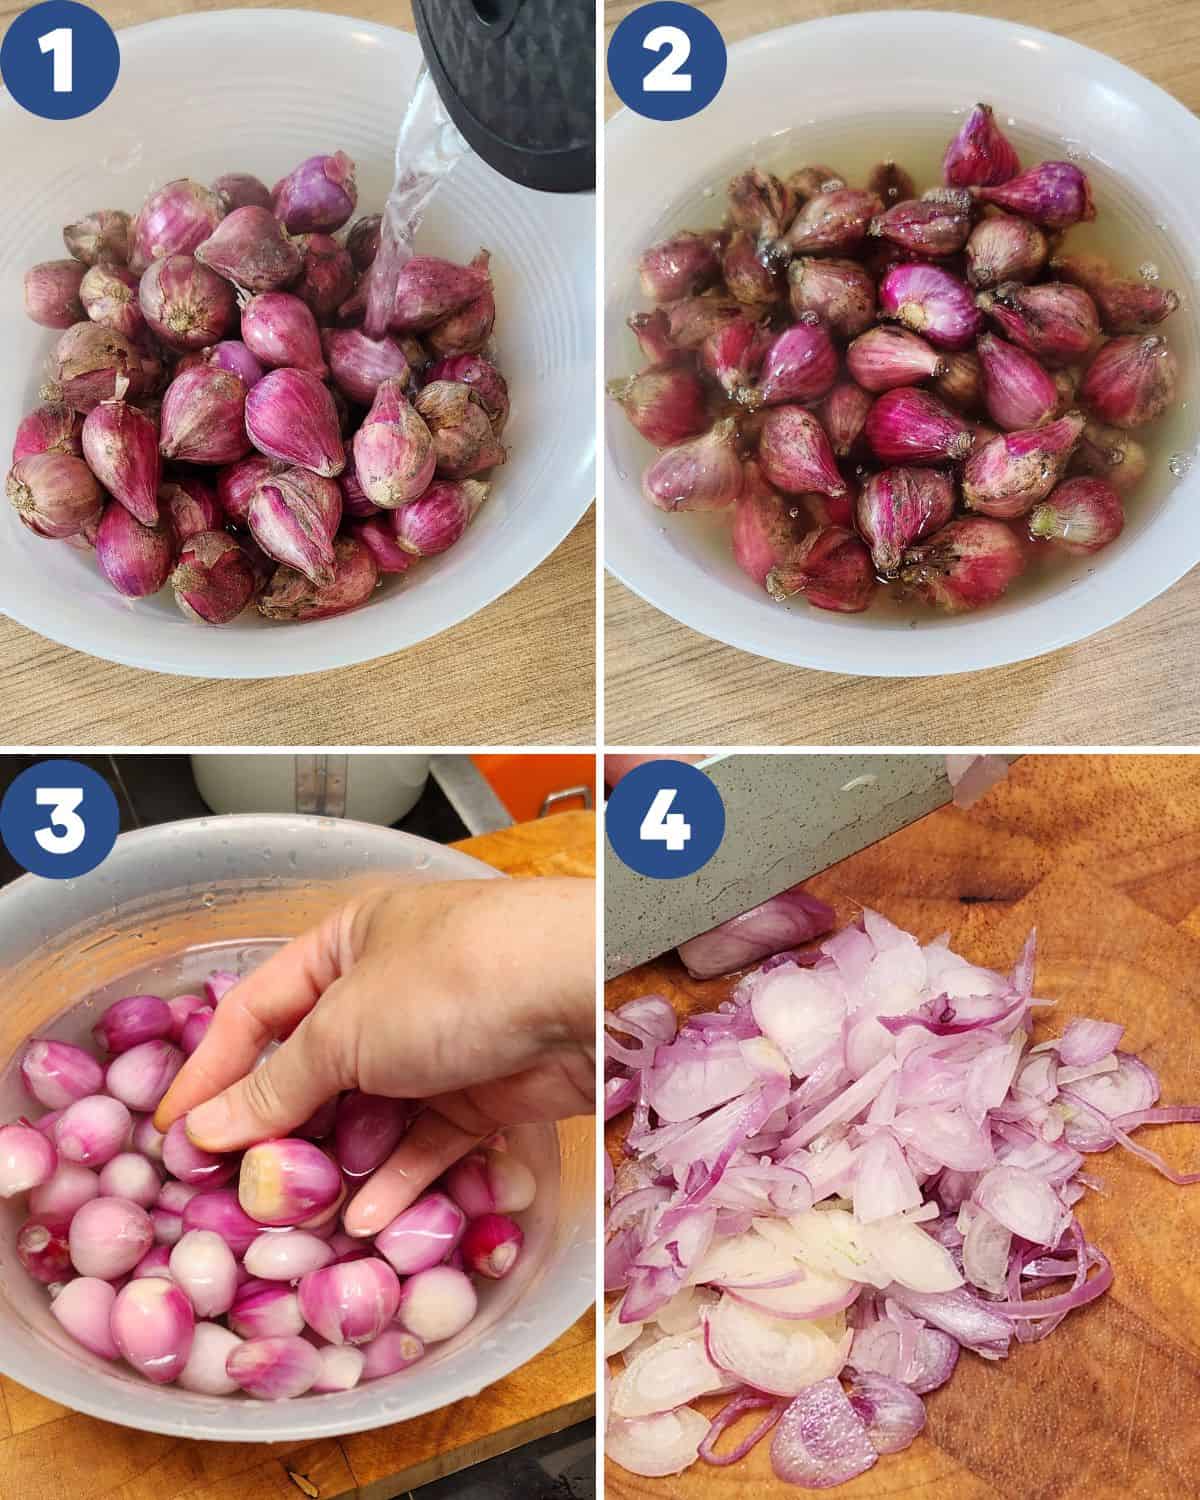
STEP 1. Soak the unpeeled shallots in hot water for 3–5 minutes (Images 1, 2). This softens the skin, makes peeling much easier, and helps reduce the tears when slicing. Drain the water, rinse immediately with cold water, then peel the shallots. Give them one more rinse with clean water (Image 3). Slice the shallots thinly and evenly. If you’re making a big batch, using a shallot slicer or mandoline will help keep the slices uniform.

STEP 2. Place the sliced shallots into a bowl of clean water (Image 5). Add a splash of vinegar (Image 6), stir briefly, then drain well. Transfer the slices to a colander and sprinkle with a little salt (Image 7). The salt is optional, if you prefer unsalted bawang goreng, you can skip this step. Toss gently with your hands so the seasoning distributes evenly (Image 8).
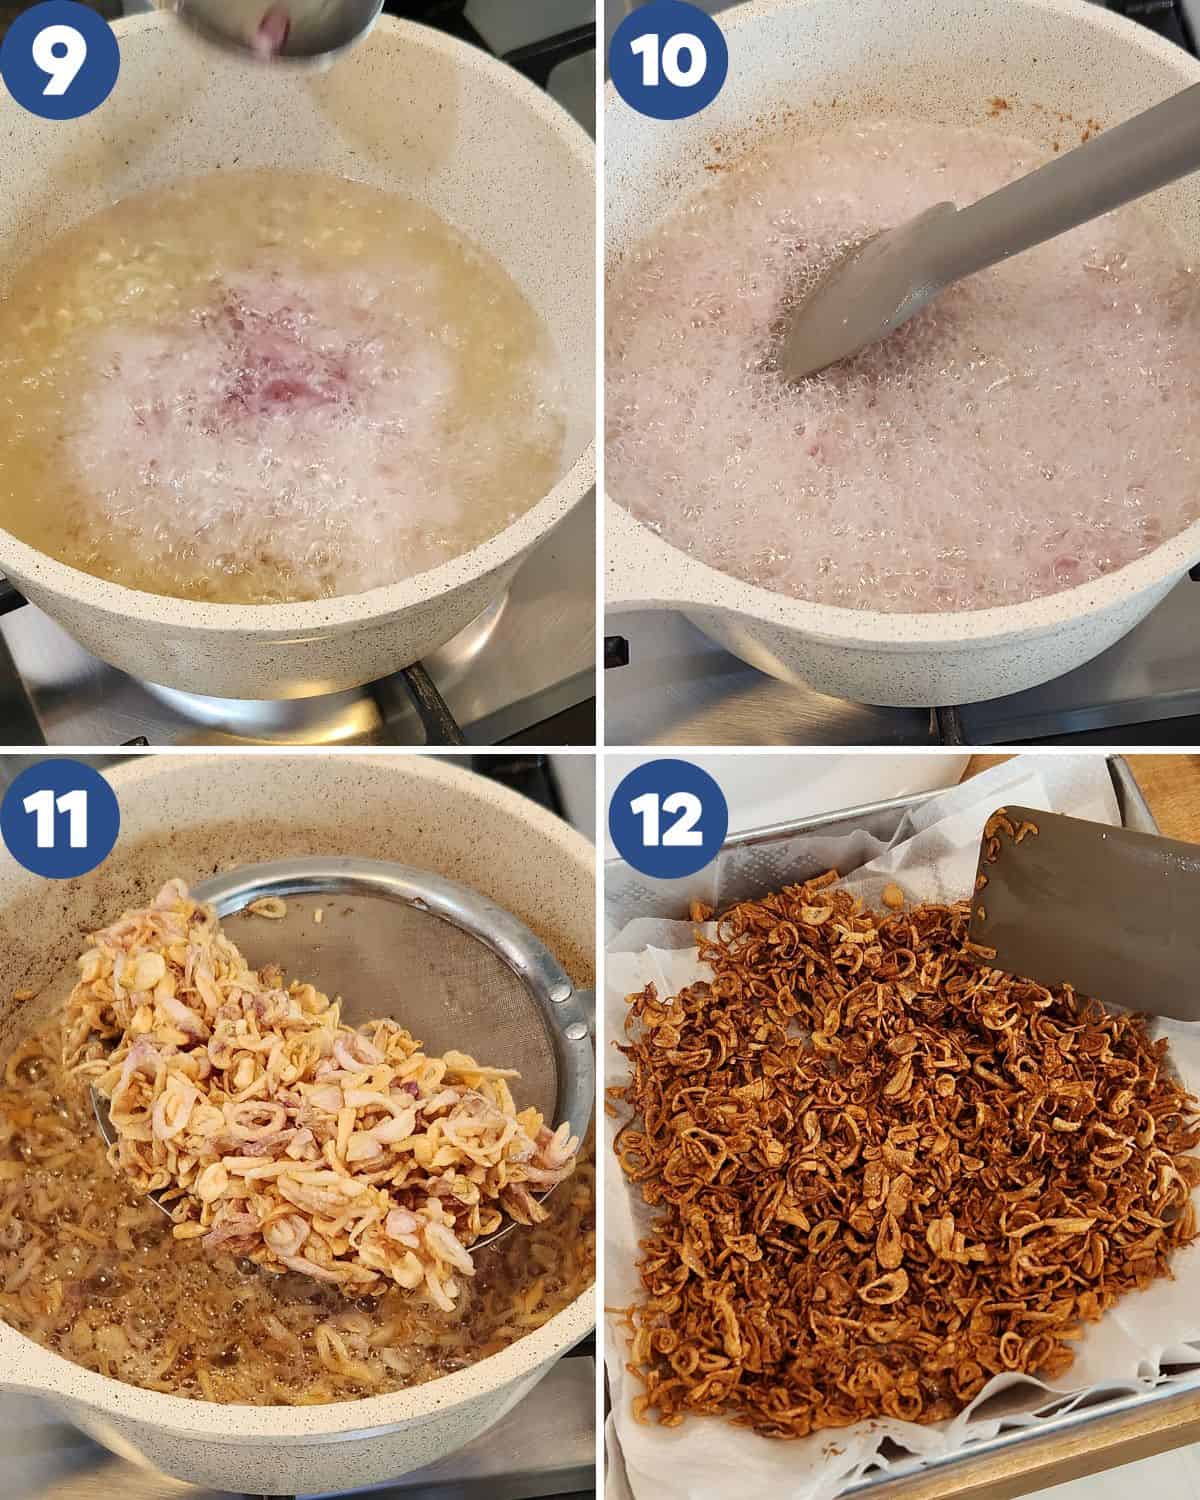
STEP 3. Heat oil in a wok or pot to about 350°F (175°C), then add the shallots (Images 9, 10). If you’re frying a large amount, work in batches to prevent overcrowding. Stir continuously so the shallots cook evenly and maintain a uniform color. When they turn a light golden brown (Image 11), remove them immediately. Spread the fried shallots on paper towels to drain and cool completely until crisp (Image 12). Once fully cooled, transfer them to an airtight jar to keep them dry and crunchy for weeks.
After removing the shallots, strain the oil to catch any browned bits. Pour the clear aromatic shallot oil into a clean jar. It’s incredibly flavorful and perfect for stir-fries, fried rice, noodles, or drizzling over soups.
Pro Tips
- Slice evenly for even crispiness – The thinner and more uniform the slices, the more consistent the color and texture will be. If your slices vary in thickness, some will burn before others are even golden.
- Control the heat (medium to low) – High heat will brown the edges too quickly while the inside stays raw. Gentle frying keeps the shallots crisp and prevents bitterness.
- Remove them before they look done – Fried shallots continue browning off-heat. Take them out when they’re still a light golden yellow to avoid over-frying.
- Spread out to cool completely – Crispiness only develops once they cool. A thin, even layer on paper towels gives you the crunchiest results.
- Don’t crowd the pan – Too many shallots at once will drop the oil temperature and make them soggy. Small batches = maximum crunch.
- Strain the oil immediately – Tiny browned bits left in the oil can burn quickly and affect the flavor. A clean, strained shallot oil stays aromatic longer.
- Store only when completely cool – Warm shallots create condensation in the jar, which leads to sogginess. Full cooling = long-lasting crispiness.
- Choose the right oil for better flavor – Coconut oil gives a lighter, cleaner result, while some store-bought versions use palm oil that tastes heavier. Using good oil makes a big difference in aroma and freshness.
- Make a big batch, it keeps well – Once you master the technique, doubling the batch is worth it. You’ll always have crispy toppings and a jar of fragrant shallot oil ready for quick meals.
How to Use Crispy Fried Shallots
Crispy fried shallots instantly make any dish taste more complete. A spoonful adds aroma, crunch, and that classic Indonesian savory-sweet flavor. Here are simple ways to enjoy them:
• Soups: Sprinkle over Soto Betawi, Soto Tangkar, or Soto Ayam for a fragrant, crunchy finish.
• Rice & Noodles: Add to Nasi Goreng Kampung, Mie Goreng, or Bihun Goreng to boost aroma and texture.
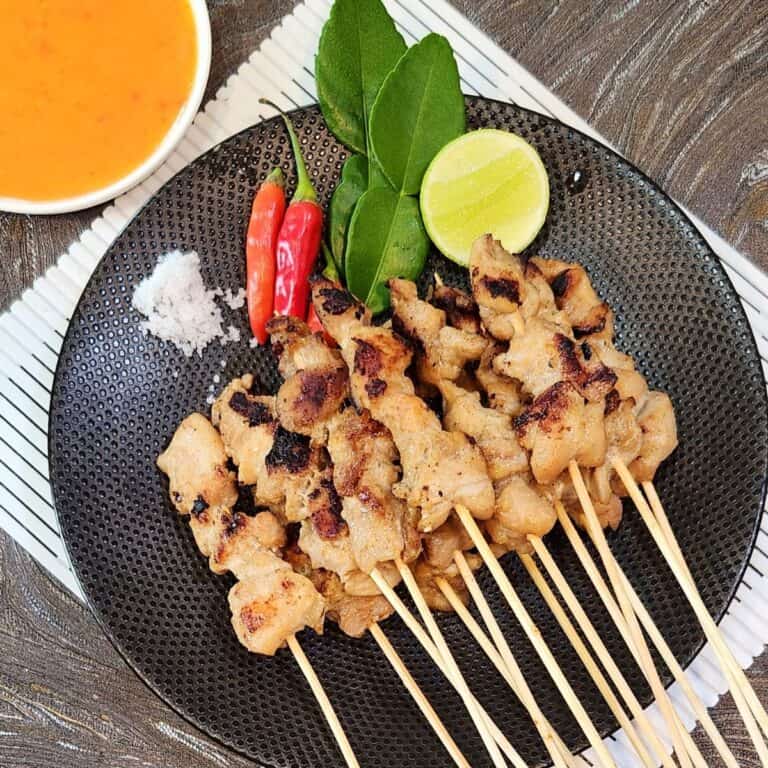
• Grilled Meats: Pair with Chicken Satay or Sate Maranggi for contrast and extra flavor.
• Curries: Top Chicken Curry or Fish Curry to balance richness with a crisp bite.
• Comfort Soups: Finish Sop Buntut with a generous handful.
• Everyday Meals: Mix into warm rice, sprinkle on stir-fries, omelets, or salads.
And don’t forget the bonus shallot oil, perfect for stir-fries, noodles, fried rice, and soups.
FAQs about Fried Shallots
This usually happens when the oil is too hot or when the shallots stay in the oil a little too long. Shallots continue browning after they’re removed from the heat, so take them out when they’re still a light golden yellow. Over-frying and high heat almost always lead to bitterness.
Moisture is the main culprit. Make sure the sliced shallots are well-drained before frying, don’t overcrowd the pan, and spread them out in a thin layer to cool completely. They crisp up as they cool, so patience during the cooling stage is key.
You can use any neutral, high-heat oil, but coconut oil gives the cleanest, lightest, and crispiest result. Many store-bought brands use palm oil, which can taste heavier and turn the shallots greasy. Using a good-quality oil makes a big difference.
Tiny browned bits left in the oil can burn quickly and affect the flavor of your next batch. Straining keeps the oil clean, aromatic, and perfect for stir-fries, fried rice, noodles, and soups.
You can, but the flavor and texture will be slightly different. Shallots have a natural sweetness and aroma that make bawang goreng taste authentic. Red onions create a crunchier but less fragrant version.
Air-frying is possible, but the texture won’t be as light or evenly crispy. Fried shallots benefit from being fully submerged in oil for even cooking. Air-frying also tends to darken the edges too fast.
Storage
Once the fried shallots are completely cool, transfer them to an airtight jar. Keep the jar in a cool, dry place and they’ll stay crispy for 3-4 weeks. For longer storage, refrigerate them, they stay fresh for up to three months.
If they soften over time, re-crisp them in the air fryer for 1–2 minutes or in a dry pan.
Don’t forget to store the strained shallot oil separately in the fridge; it stays good for 2–3 weeks and is perfect for stir-fries and noodles.

Crispy Fried Shallots or Bawang Goreng
Equipment
- 1 slicer
Ingredients
- 500 gr shallots
- 1 tbsp vinegar
- ½ tbsp salt optional
Instructions
- Soak the unpeeled shallots in hot water for 3–5 minutes. This softens the skin, makes peeling much easier, and helps reduce the tears when slicing. Drain the water, rinse immediately with cold water, then peel the shallots. Give them one more rinse with clean water. Slice the shallots thinly and evenly. If you’re making a big batch, using a shallot slicer or mandoline will help keep the slices uniform.
- Place the sliced shallots into a bowl of clean water. Add a splash of vinegar, stir briefly, then drain well. Transfer the slices to a colander and sprinkle with a little salt. The salt is optional, if you prefer unsalted bawang goreng, you can skip this step. Toss gently with your hands so the seasoning distributes evenly.
- Heat oil in a wok or pot to about 350°F (175°C), then add the shallots. If you're frying a large amount, work in batches to prevent overcrowding. Stir continuously so the shallots cook evenly and maintain a uniform color. When they turn a light golden brown, remove them immediately. Spread the fried shallots on paper towels to drain and cool completely until crisp. Once fully cooled, transfer them to an airtight jar to keep them dry and crunchy for weeks.
- After removing the shallots, strain the oil to catch any browned bits. Pour the clear aromatic “shallot oil” into a clean jar. It’s incredibly flavorful and perfect for stir-fries, fried rice, noodles, or drizzling over soups.
Notes
- Slice evenly for even crispiness – The thinner and more uniform the slices, the more consistent the color and texture will be. If your slices vary in thickness, some will burn before others are even golden.
- Control the heat (medium to low) – High heat will brown the edges too quickly while the inside stays raw. Gentle frying keeps the shallots crisp and prevents bitterness.
- Remove them before they look done – Fried shallots continue browning off-heat. Take them out when they’re still a light golden yellow to avoid over-frying.
- Spread out to cool completely – Crispiness only develops once they cool. A thin, even layer on paper towels gives you the crunchiest results.
- Don’t crowd the pan – Too many shallots at once will drop the oil temperature and make them soggy. Small batches = maximum crunch.
- Strain the oil immediately – Tiny browned bits left in the oil can burn quickly and affect the flavor. A clean, strained shallot oil stays aromatic longer.
- Store only when completely cool – Warm shallots create condensation in the jar, which leads to sogginess. Full cooling = long-lasting crispiness.
- Choose the right oil for better flavor – Coconut oil gives a lighter, cleaner result, while some store-bought versions use palm oil that tastes heavier. Using good oil makes a big difference in aroma and freshness.
- Make a big batch, it keeps well – Once you master the technique, doubling the batch is worth it. You’ll always have crispy toppings and a jar of fragrant shallot oil ready for quick meals.


Crispy, fragrant, and so addictive! Once you make your own fried shallots, you’ll never want the store-bought version again!