

Japanese Red Bean Bread (Anpan) – Soft Milk Bread
 This post may contain affiliate links.
This Japanese Red Bean Bread is soft, fluffy, and not too sweet, just the perfect little bun for breakfast, tea time, or a late-night snack. It’s simple bakery comfort you can make right at home.

A Quick Look at the Recipe
🏷️ Recipe Name: Japanese Red Bean Bread (Anpan)
⏱️ Ready In: ~ 2 hours 20 minutes
🍽️ Serves: 6 pieces
🔥 Calories: 346 kcal (per piece)
🧾 Main Ingredients: Flour, milk powder, sugar, instant yeast, egg yolks, unsalted butter, salt, red bean paste.
🥗 Dietary Info: Halal
🧠 Difficulty: Easy for beginner, very simple steps.
Have a question? Ask AI!
Soft, fluffy, and lightly sweet, Japanese Red Bean Bread (Anpan) is one of those bakery classics that feels comforting from the very first bite. The pillowy milk bread wraps around a smooth red bean filling, giving you that perfect balance of tender dough and subtle sweetness.
If you enjoy baking soft Asian breads at home, you might also like this collection of Asian bread recipes you can make at home.
If you enjoy soft Japanese breads like Japanese Milk Bun, Milk Hearth Bread (Mirukuhasu), or even Chocolate Milk Hearth Bread, or even my buttery, my buttery, crisp-on-the-outside Salt Bread, this red bean bun will feel very familiar. It has that same cloud-soft texture, just with a nostalgic red bean center that makes it special.
Red bean filling is also widely loved in other treats such as Dorayaki, Wife Cakes, and Salted Egg Yolk Pastry with Red Bean, so if those already have a place in your heart (or your kitchen), this recipe is going to fit right in.
Before we start shaping the dough and filling, let’s take a moment to talk about what makes Anpan unique.
What is Anpan?
Anpan is one of Japan’s most iconic bakery buns. It is a soft, fluffy milk bread filled with sweet red bean paste (anko). It was created during the Meiji era as a fusion of Japanese flavors and Western-style bread, and it quickly became a favorite. Today, you’ll find Japanese Red Bean Bun in Japanese bakeries, convenience stores, and cafés, often topped with sesame seeds. Alongside sweet red bean buns, savory options like Japanese salt bread (shio pan) are also common in modern bakeries.
Why You Will Love This Recipe
Recipe Ingredients
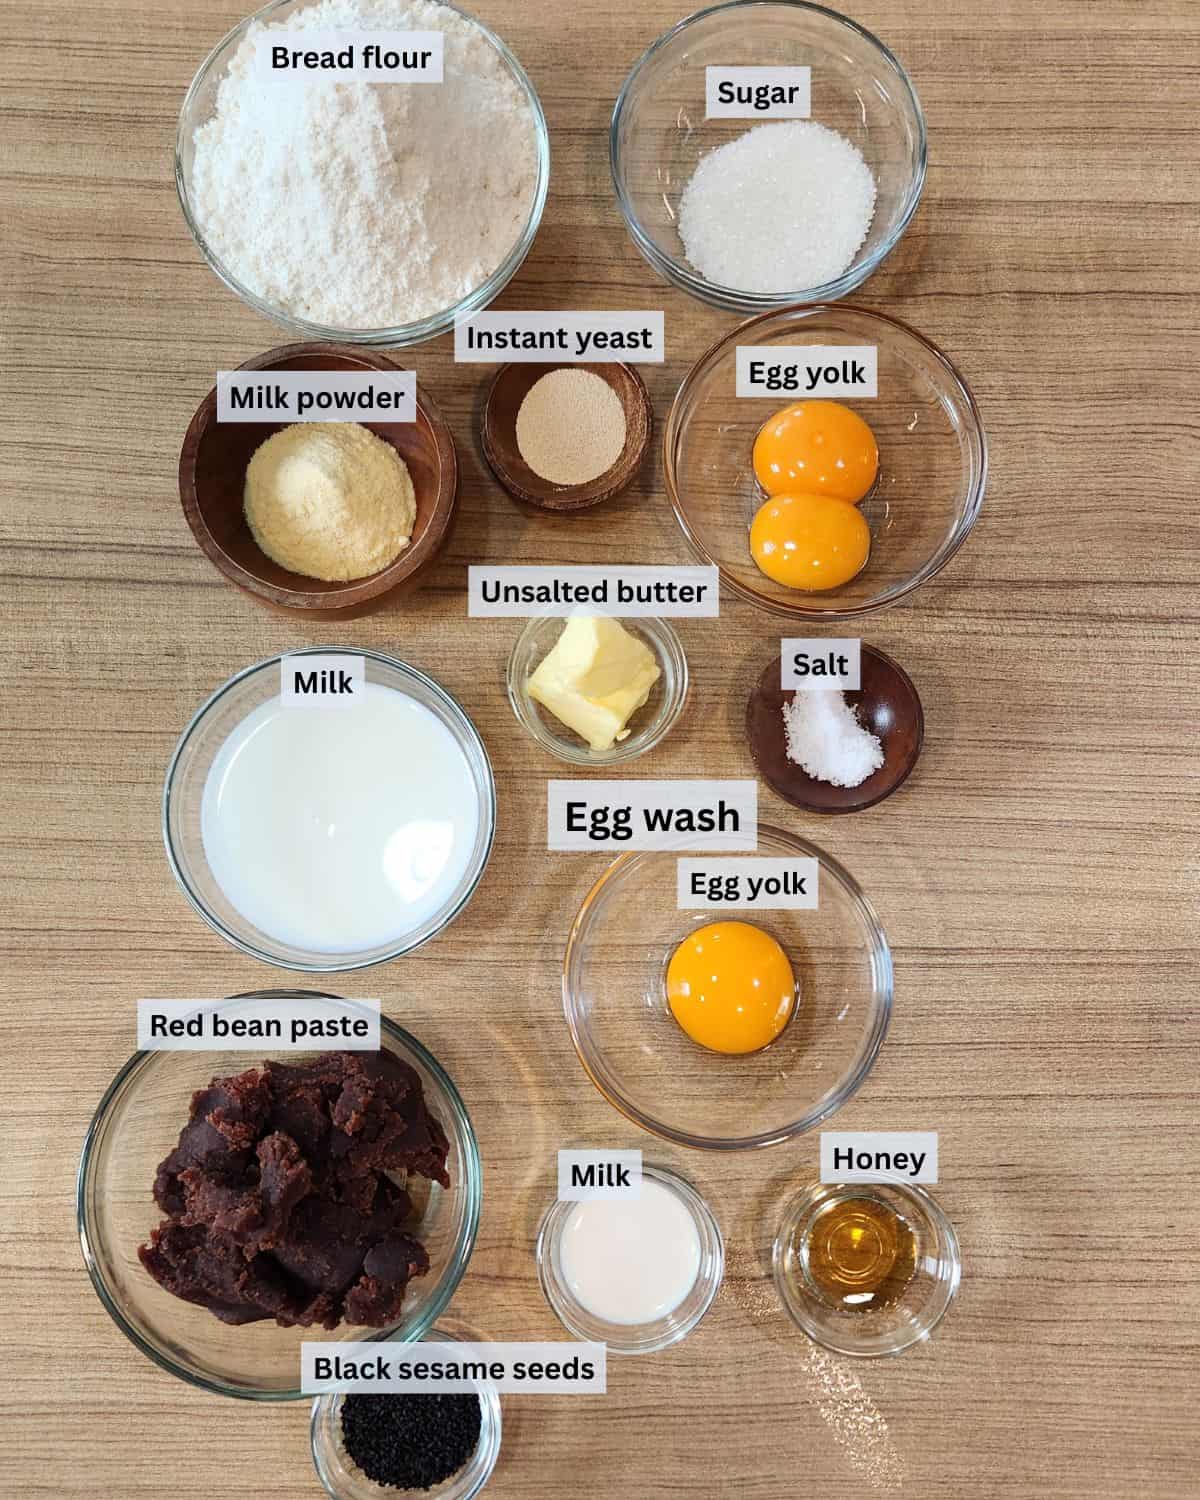
Ingredient Notes
Bread flour – Using bread flour helps create that signature chewy, stretchy milk bread texture. All-purpose flour can work, but the bread won’t be quite as fluffy.
Milk – Whole milk gives the dough moisture and richness. It helps keep the bread soft for longer.
Egg yolk – The yolks add richness and help create an even softer, fluffier crumb. They also improve the bread’s color and structure.
Red bean paste (Anko): You can use store-bought or homemade. If it feels soft or sticky, chilling it for 15–30 minutes makes shaping easier.
Sesame seeds (optional): A sprinkle of white or black sesame seeds adds a nice visual finish and a subtle nutty flavor.
Be sure to check out the full recipe and ingredient list below
How to Make Red Bean Bread

STEP 1. Mix the dough. Sift the bread flour and milk powder into a mixing bowl (Image 1). Add the sugar, instant yeast, egg yolks, and milk (Images 2, 3). Attach the paddle and begin mixing (Image 4) until everything is well combined.

STEP 2. Add butter and salt. Once the dough starts to form, add the butter and salt (Images 5, 6). Continue mixing until the dough becomes smooth, elastic, and stretchy. You can test it by gently pulling a piece of dough. If it stretches thinly without tearing, you’ve reached the “windowpane” stage (Image 7). Transfer the dough to a bowl, cover with cling wrap or a cloth, and let it rise for about 1 hour (Image 8).

STEP 3. Prepare the filling and shape the dough. While the dough is rising, weigh the red bean paste and divide it into 6 equal portions. Shape each portion into a ball and cover to prevent drying out (Image 9). After the first rise, gently punch down the dough (Image 10), divide it into 6 equal pieces, and shape each one into a round ball (Image 11). Flatten each dough ball with a rolling pin (Image 12).

STEP 4. Fill and seal. Place a ball of red bean filling in the center of the flattened dough (Image 13). Pinch the edges together tightly to seal, ensuring the filling stays inside while baking (Image 14). Place each bun into a cupcake liner or directly on a baking tray (Image 15). Mix egg yolk, milk, and honey to make the egg wash (Image 16).

STEP 5. Bake. Brush the tops with the egg wash (Image 17) and sprinkle sesame seeds in the center if desired (Images 18, 19). Bake in a preheated oven at 356°F (180°C) for 17–20 minutes, or until golden brown (Image 20). Enjoy warm and fresh from the oven. Trust me, they’re irresistible!
Pro Tips
- Chill the filling – If your red bean paste feels soft or sticky, chill it for 15–30 minutes before shaping. Cold filling is much easier to wrap without tearing the dough.
- Don’t skip the first rise – The dough needs enough time to rest and grow. A properly fermented dough gives you better flavor and a softer, lighter texture.
- Check the windowpane – Stretch a small piece of dough. If it becomes thin and translucent without breaking, the gluten is developed and the bread will bake up beautifully fluffy.
- Golden, not dark – Milk bread browns quickly in the oven due to the sugar and milk. As soon as it turns lightly golden, it’s done. No need to wait for a deep brown crust.
Serving Suggestions
These buns make a lovely sweet treat after a savory Japanese meal. Serve them after dishes like Gyudon or Takikomi Gohan for a cozy and balanced finish. They pair beautifully with creamy drinks like Earl Grey Milk Tea or Oolong Milk Tea. If you prefer something light and refreshing, a cup of Lemongrass Pandan Tea or Lemon Ginger Drink is also a perfect match.
Red Bean Bread FAQs
Yes, store-bought red bean paste works great and saves time. If you prefer homemade, make sure it’s thick and not watery so it’s easy to shape and seal.
Likely causes include under-kneading, rushing fermentation, or adding too much flour. Make sure the dough reaches the windowpane stage and allow enough proofing time.
Absolutely. These buns are versatile: custard filling, chocolate spread, peanut butter, sweet potato paste, or lotus paste all work beautifully.
Yes. After the first rise, you can refrigerate the dough overnight. Let it come back to room temperature before shaping and baking.

Storage
Store the buns in an airtight container and keep them in the fridge for up to 5 days. Surprisingly, they stay soft and fluffy even when chilled, no reheating needed. If you prefer them warm, a quick heat in the oven or air fryer will make them taste freshly baked.
More Japanese Recipes
- Hokkaido Cheese Tart
- Melon Pan
- Japanese Beef Croquette
- Chicken Karaage
- Japanese Pancake: Dorayaki
- Chocolate Dorayaki
- Egg for Ramen
- Japanese Cheesecake

Japanese Red Bean Bread (Anpan) – Soft Milk Bread
Ingredients
- 200 gr flour
- 10 gr milk powder
- 25 gr sugar
- 4 gr instant yeast
- 2 egg yolks
- 95 ml milk
- 25 gr unsalted butter
- 3 gr salt
Filling
- 240 gr red bean paste
Eggwash
- 1 egg yolk
- 1 tbsp milk
- 1 tsp honey
Topping
- 2 tbsp sesame seeds black or white
Instructions
- Sift the bread flour and milk powder into a mixing bowl. Add the sugar, instant yeast, egg yolks, and milk. Attach the paddle and begin mixing until everything is well combined.
- Once the dough starts to form, add the butter and salt. Continue mixing until the dough becomes smooth, elastic, and stretchy. You can test it by gently pulling a piece of dough. If it stretches thinly without tearing, you’ve reached the “windowpane” stage. Transfer the dough to a bowl, cover with cling wrap or a cloth, and let it rise for about 1 hour.
- While the dough is rising, weigh the red bean paste and divide it into 6 equal portions. Shape each portion into a ball and cover to prevent drying out. After the first rise, gently punch down the dough, divide it into 6 equal pieces, and shape each one into a round ball. Flatten each dough ball with a rolling pin.
- Place a ball of red bean filling in the center of the flattened dough. Pinch the edges together tightly to seal, ensuring the filling stays inside while baking. Place each bun into a cupcake liner or directly on a baking tray. Mix egg yolk, milk, and honey to make the egg wash.
- Brush the tops with the egg wash and sprinkle sesame seeds in the center if desired. Bake in a preheated oven at 356°F (180°C) for 17–20 minutes, or until golden brown. Enjoy warm and fresh from the oven. Trust me, they’re irresistible!
Notes
- Chill the filling – If your red bean paste feels soft or sticky, chill it for 15–30 minutes before shaping. Cold filling is much easier to wrap without tearing the dough.
- Don’t skip the first rise – The dough needs enough time to rest and grow. A properly fermented dough gives you better flavor and a softer, lighter texture.
- Check the windowpane – Stretch a small piece of dough. If it becomes thin and translucent without breaking, the gluten is developed and the bread will bake up beautifully fluffy.
- Golden, not dark – Milk bread browns quickly in the oven due to the sugar and milk. As soon as it turns lightly golden, it’s done. No need to wait for a deep brown crust


These Japanese Red Bean Buns turned out so soft, fluffy, and lightly sweet, just like the ones from a bakery. The best part? They stay soft even after chilling in the fridge for days. So good with milk tea or coffee!