
The Secret to a Perfect Burnt Basque Cheesecake
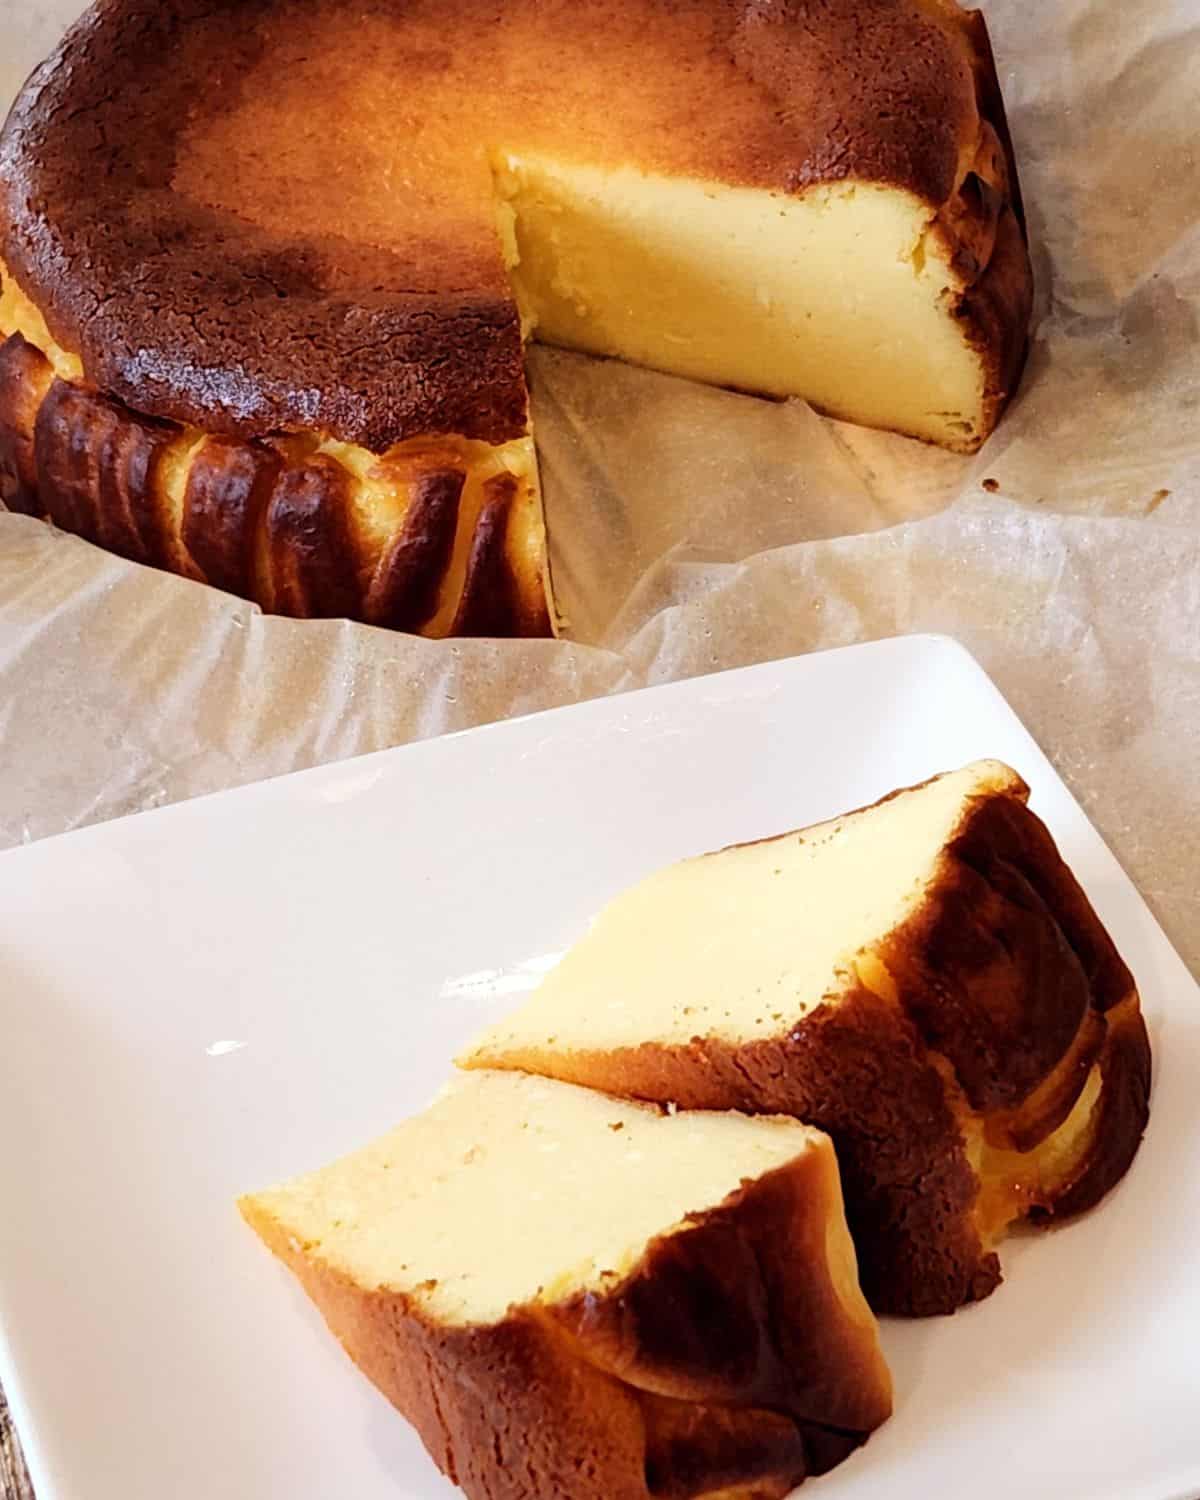
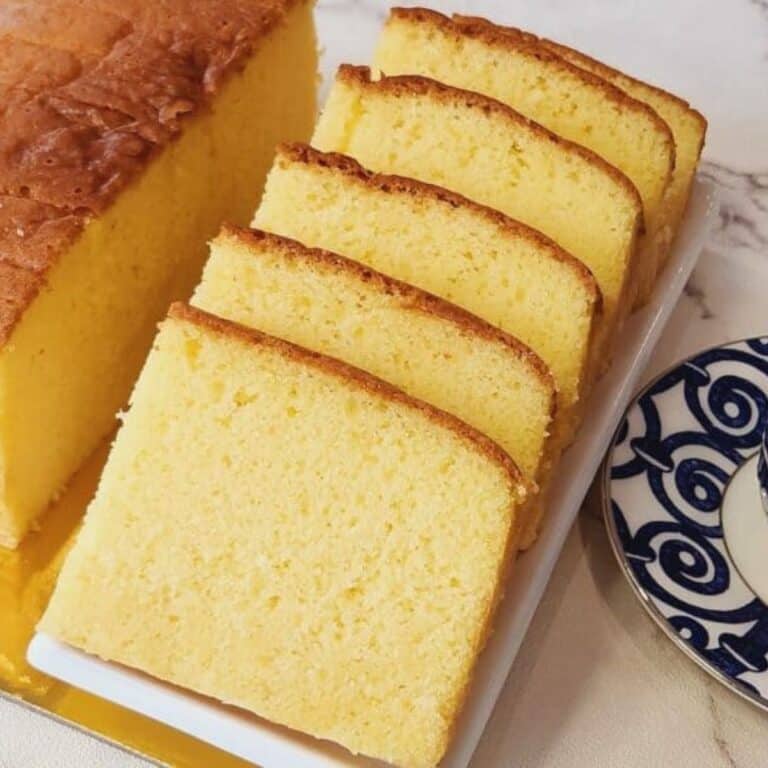
Burnt basque cheesecake is a delicious cheesecake with a slightly burnt top with silky smooth creamy texture. It is easy to make and perfect for any occasion!
Cheesecake has always held a special place in my heart—no other dessert compares. While I adore sweets in general, anything with cheese takes the crown. In fact, if given the choice, I’d pick a cheesy treat over chocolate any day!
Burnt Basque cheesecake had been all over Instagram for ages before I finally tried making it myself. And oh, was it worth the wait—that irresistibly creamy texture makes it impossible to stop at just one slice!
Though the Classic New York Cheesecake remains my ultimate favorite, I’m always eager to explore other variations, like No-Bake Mango Cheesecake or Hokkaido Cheese Tarts. Honestly, if it’s made with cheese, I’m already sold!
Why You Will Love This Recipe
Recipe Ingredients
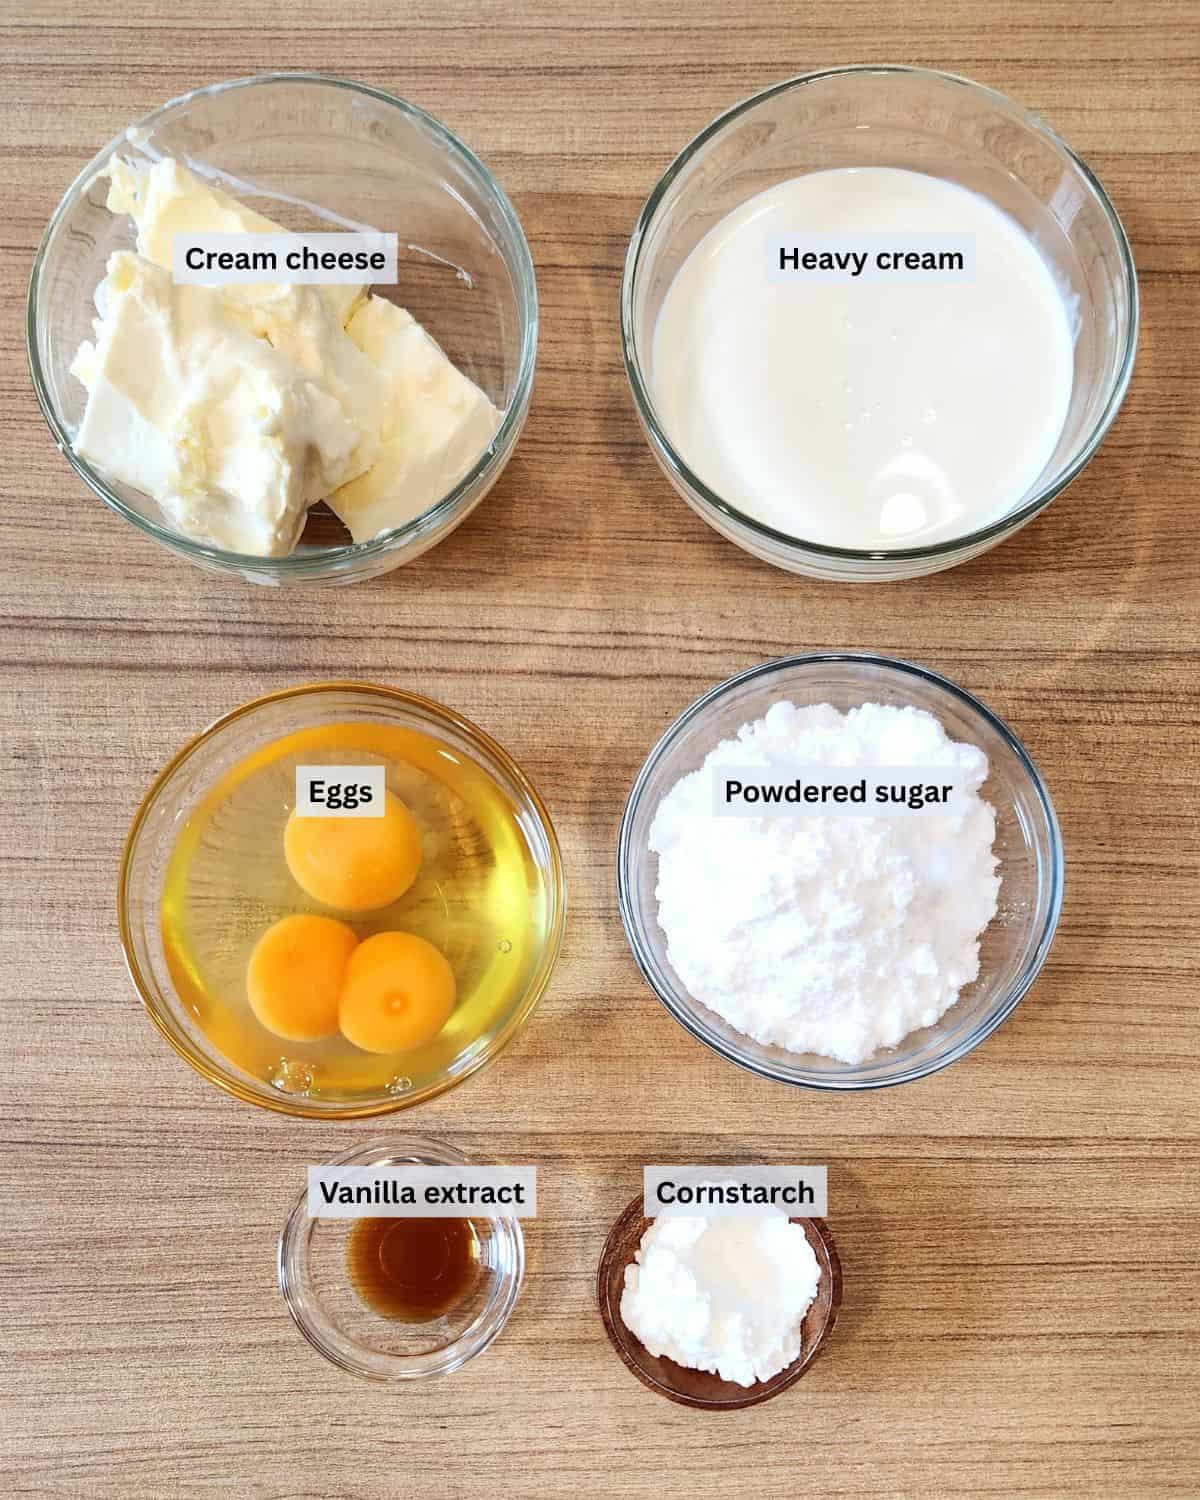
Ingredient Notes
Cream cheese – Use soft cream cheese in room temperature. It is easier to mix when soft. And it will not curdle when mixed with other ingredients.
Powdered sugar – Use powdered sugar so it mixes easily with the cream cheese. You may grind your regular sugar to powdered form.
Whipping cream – Add liquid whipping cream to make the batter even softer and to create silky texture.
Cornstarch – You may opt to use cornstarch or not depending on your preference. The cream cheese batter will still set even without the cornstarch.
Vanilla extract – Additionally vanilla extract will give more flavor to the cheesecake.
Substitutions & Variations
Besides the original version of burnt basque cheesecake, you can always experiment with flavors like cocoa powder, espresso , matcha powder or even pandan extract for variations.
A Pandan Burnt Basque Cheesecake, for instance, offers a uniquely exotic twist with its sweet, aromatic fragrance!
Be sure to check out the full recipe and ingredient list below
How to Make
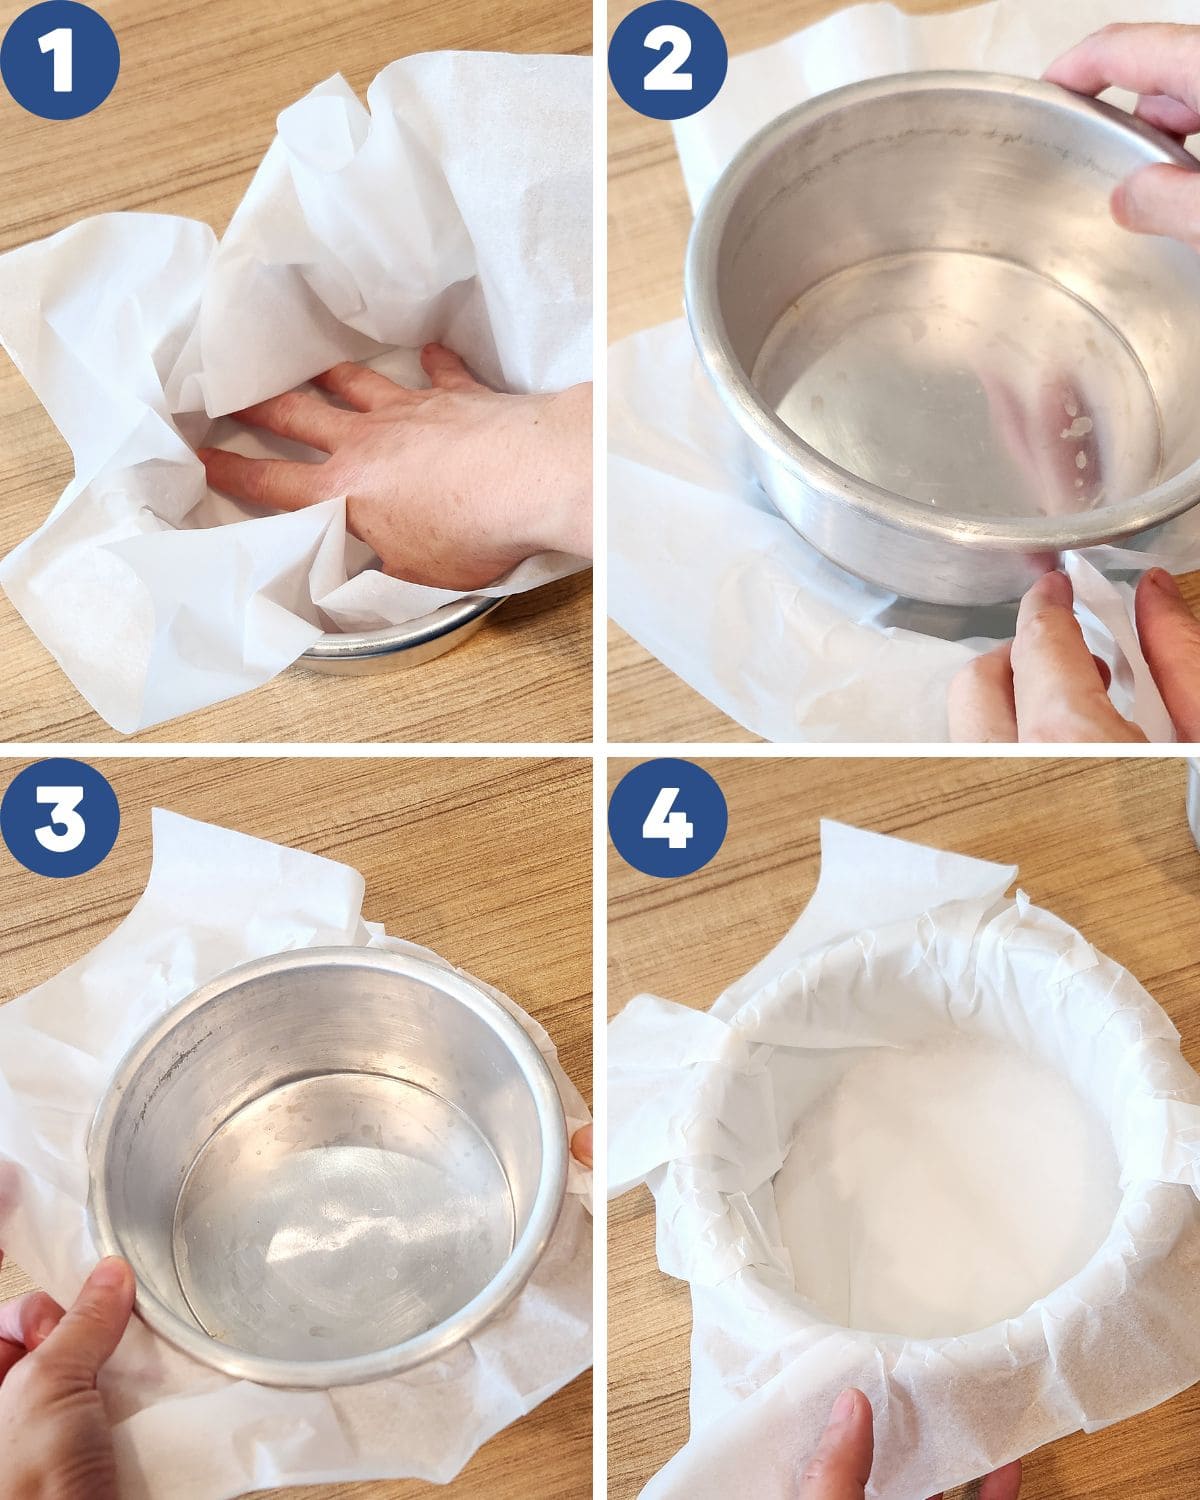
STEP 1. Place a sheet of parchment paper into a 15 cm round baking pan (Image 1). Use another pan the same size to press the paper in (Images 2, 3). The creases can shape as natural as possible when pressed with another pan (Image 4). Preheat the oven at 220-240°C.
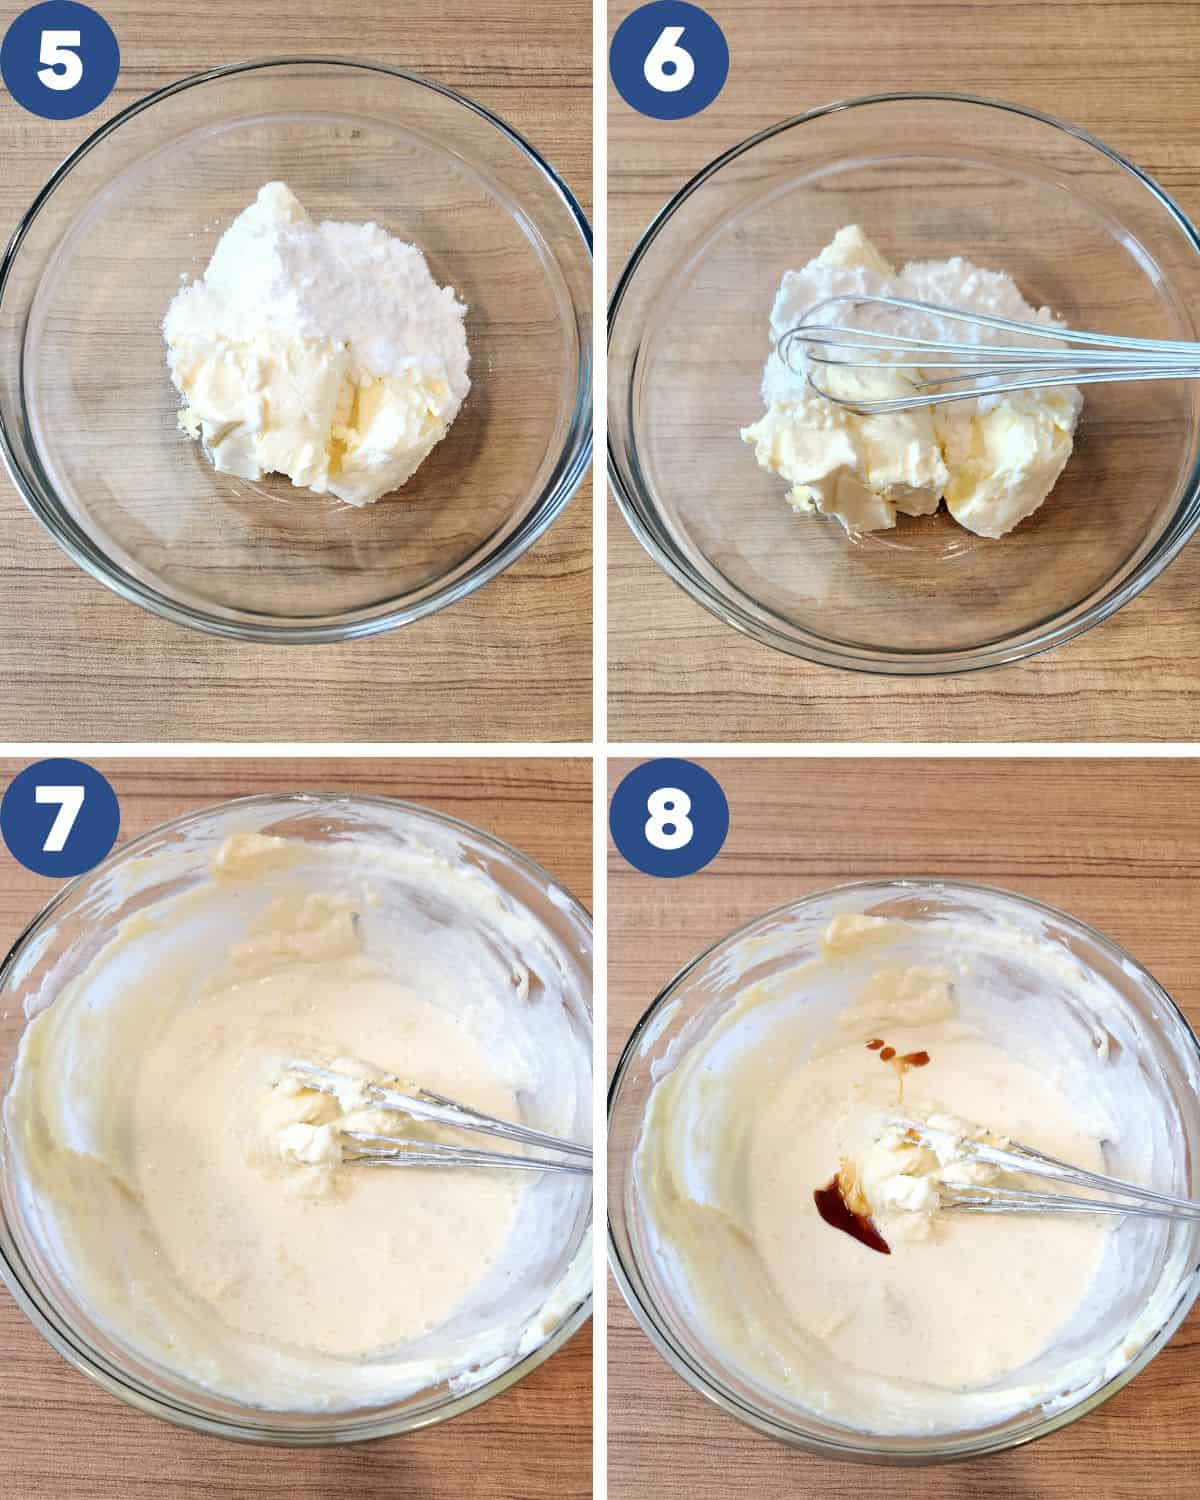
STEP 2. Prepare the cream cheese in room temperature. Wait until the cream cheese is soft and easier to process. Soften the cream cheese and powdered sugar using a whisk (Images 5, 6, 7). Pour in heavy cream and vanilla extract (Image 8).
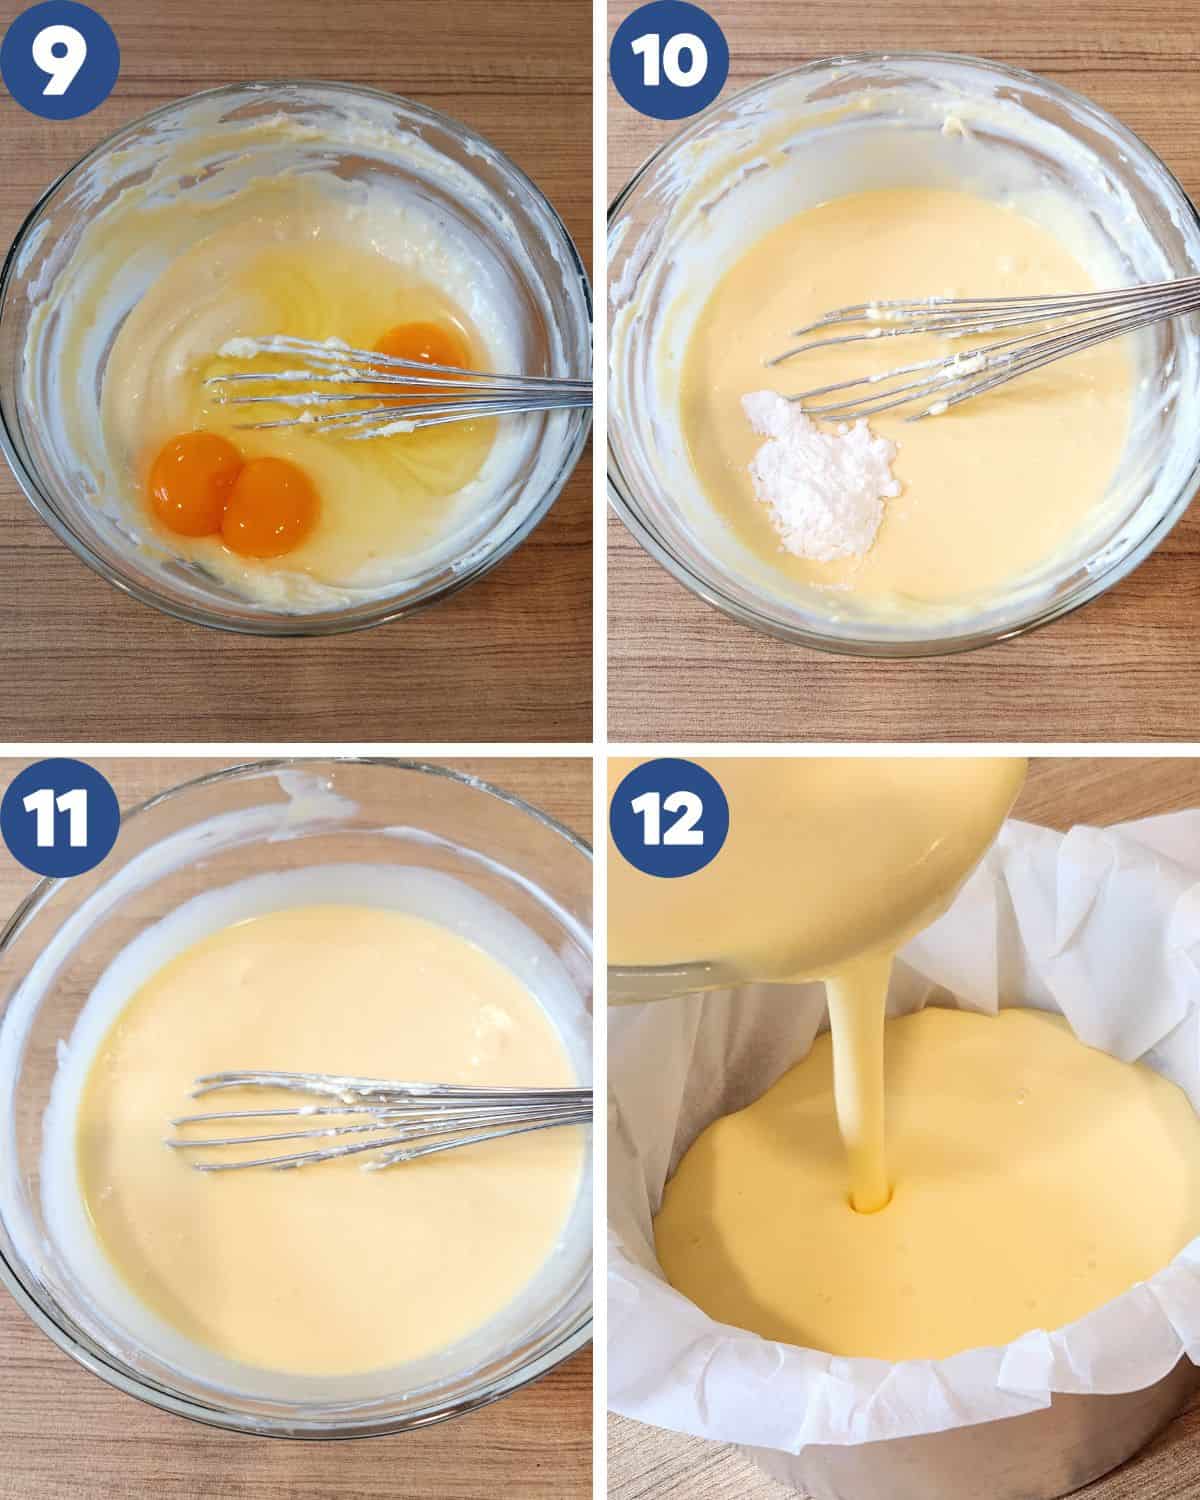
STEP 3. Add the eggs and cornstarch into the batter (Images 9, 10). Whisk well until smooth (Image 11). Pour the batter into the baking pan (Image 12).
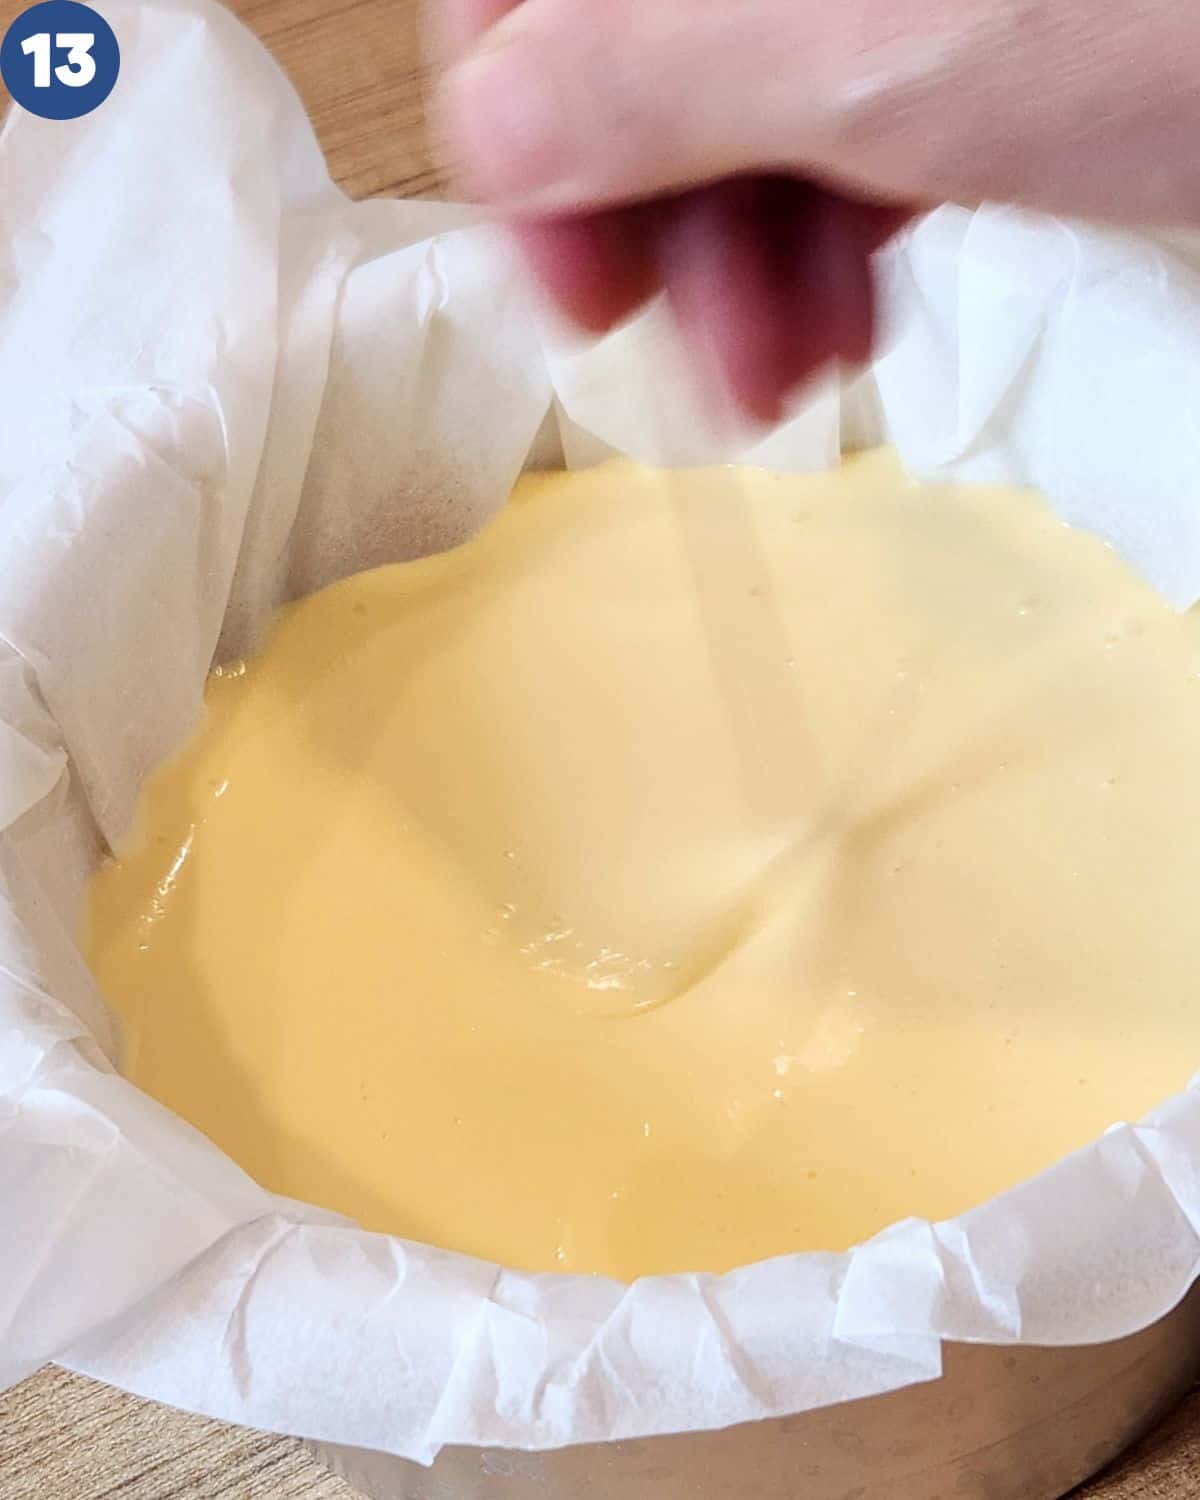
STEP 4. Use a stick to stir the batter. This will let out the air bubbles so the cake will be baked evenly.
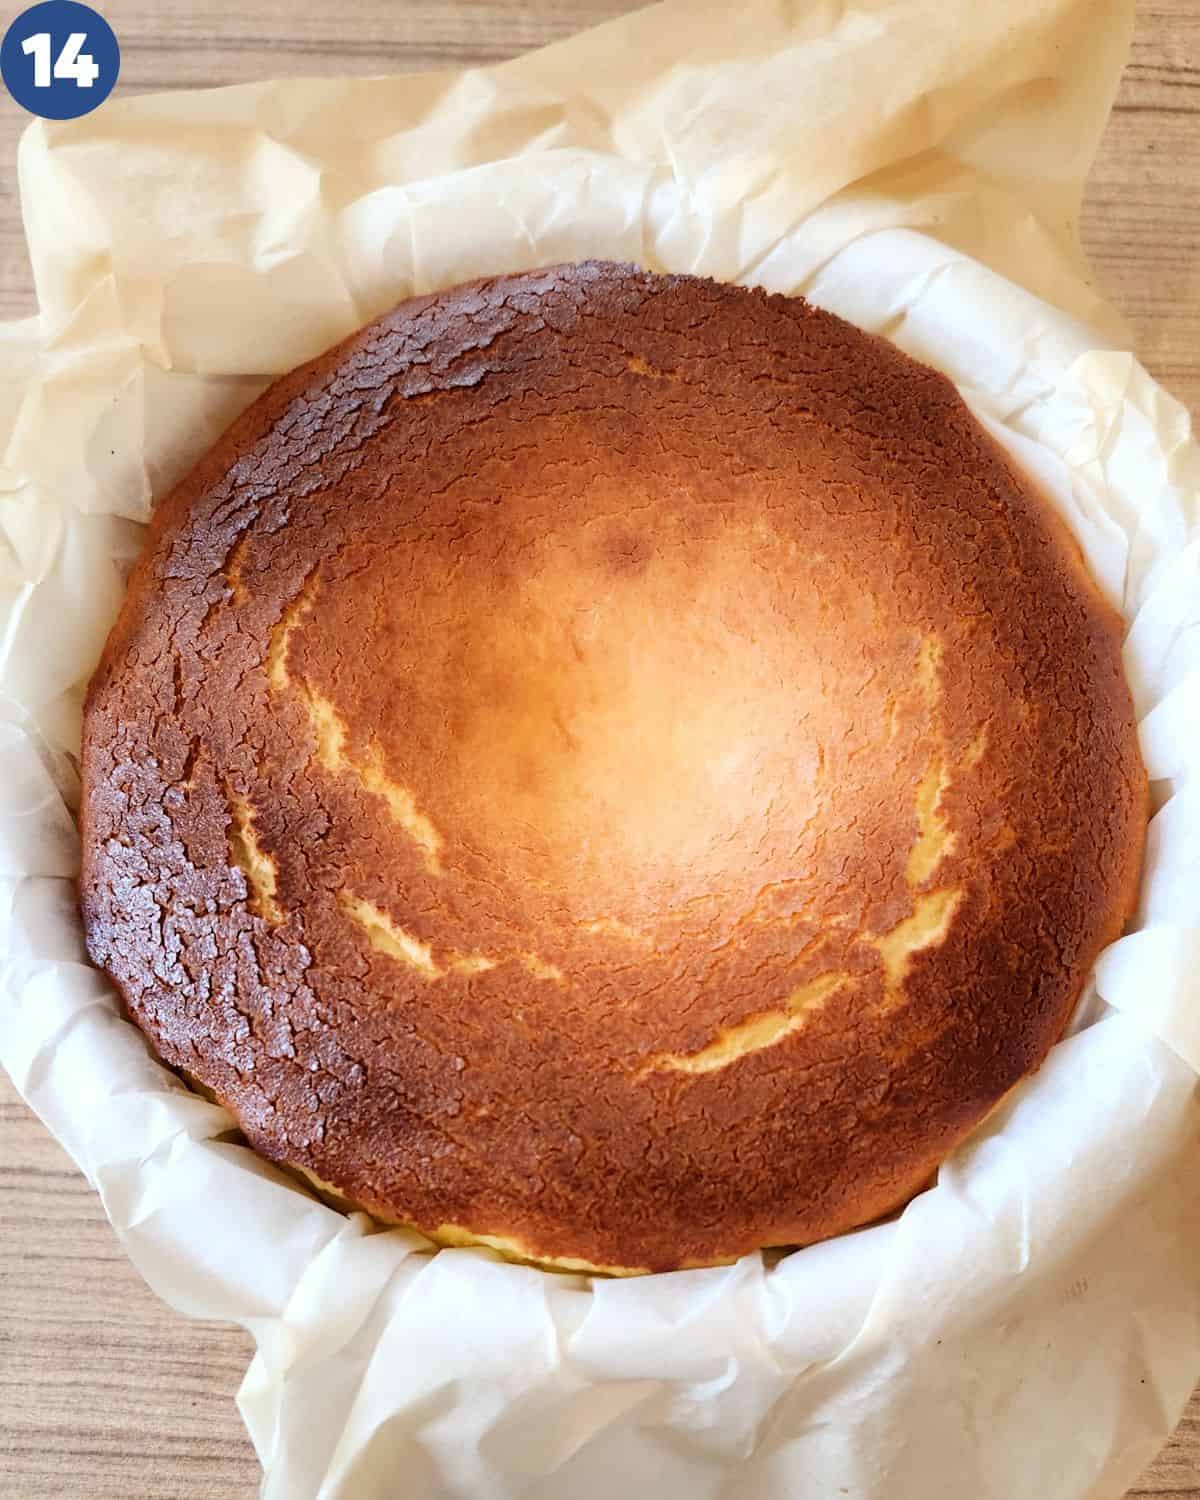
STEP 5. Bake in the preheated oven for 25 – 40 minutes. When it is 25-30 minutes, please watch over it to prevent it being overbaked.
Pro Tips
- Always mix with a low speed mixer or a whisk. Do not use high speed because it will create more air bubbles in the batter.
- Use room temperature cream cheese so it is easier to soften it and the cheese will not curdle.
- You can mix the eggs one at a time, putting the next only after the batter is just incorporated.
- Only mix each ingredient until just combined. Do not overmix as not to create lots of air bubbles.
- Tap the baking pan a few times to let the air bubbles come out before baking or use a stick
- The cake will be jiggly and rise up to double. Take it out and let it cool completely. It will deflate, but don’t worry.
- Let the cheesecake cool down before putting it in the refrigerator.
- This is the crucial part in baking basque cheesecake. The temperature should be around 220 – 240°C. This will rise up the cake batter and burn the surface completely. Bake it for 25 –30 minutes.
- If you make a bigger size, you need to adjust the baking time. It can be around 40-50 minutes for an 8 inch round baking pan.
How to Serve
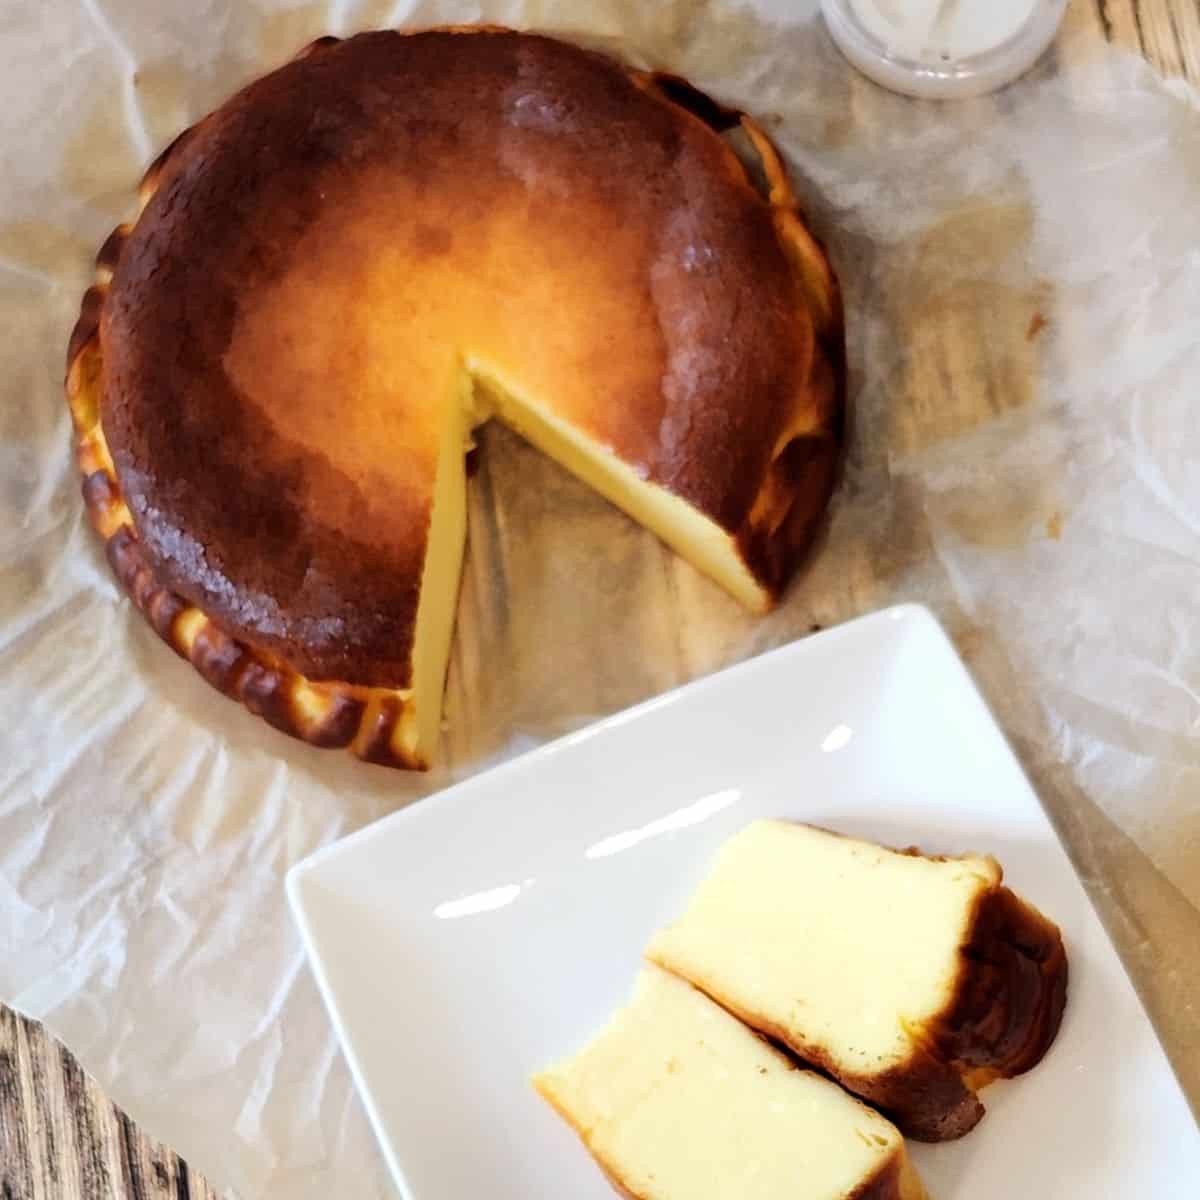
Let it cool down completely. When it has cooled down, transfer to the refrigerator. Keep it for 2 hours to overnight. Then it is ready to consume. Peel the baking paper and slice to your preference.
Serve this delicious dessert with a glass of Butterfly Pea Flower Latte or Earl Grey Milk Tea. You can top it with Coconut Jam.
FAQs about Burnt Basque Cheesecake
Burnt basque cheesecake is baked with the intention of burning the surface and the sides that touch the parchment paper to give it a rustic look. Other cheesecakes are baked with water bath method.
This recipe uses very small amount of cornstarch. Cornstarch will make the cake smooth and jiggly. You may omit the cornstarch and it becomes completely gluten-free. The cake will only be slightly more creamier.
The oven might not be hot enough to burn the top surface of the cake. The temperature should be around 220 – 240°C, top and bottom heat.
Storage
This cake will last up to 5 days in a closed container in the fridge. If you keep it frozen, it can last longer, up to 2 weeks.
More Recipes with Cream Cheese
You might want to check another recipe with cream cheese that I have posted: Mango Sago Dessert with Cream Cheese or Cream Cheese Chiffon Cake.
Burnt Basque Cheesecake
Equipment
- 1 baking pan 6.4 inch baking pan
Ingredients
- 250 gr cream cheese
- 75 gr powdered sugar
- 2 eggs
- 115 gr whipping cream
- 10 gr cornstarch
- ½ tsp vanilla extract
Instructions
- Prepare a baking tin. You may use a 15 cm round baking pan. Lay a piece of baking paper.
- Preheat the oven at 220-240°C.
- Prepare the cream cheese in room temperature. Wait until the cream cheese is soft and easier to process.
- Soften the cream cheese by beating it with a mixer using low speed.
- Add the powdered sugar into the cream cheese. Beat with low speed and the cream cheese will get creamier.
- Now add one egg at a time, mixing it with low speed so the cream cheese does not curdle.
- Afterwards pour in the whipping cream, mix well. Keep the speed to minimum so the cream cheese mixture is very smooth.
- Add cornstarch and vanilla extract. Mix for a while until well blended.
- The batter should be runny and smooth.
- Pour the batter into the lined baking pan.
- Bake for 25-40 minutes. When it is 25-30 minutes, please watch over it to prevent it being overbaked. If you like it to be slightly burned, take it out after 30-35 minutes. If you want darker color, keep baking until 40 minutes.
- The cake will be jiggly and rise up to double. Take it out and let it cool completely. It will deflate, but don’t worry.
- When it has cooled down, transfer to the refrigerator. Keep it for 2 hours to overnight.
- Then it is ready to consume. Peel the baking paper and slice to your preference. Enjoy!
Video
Notes
- Always mix with a low speed mixer. Do not use high speed because it will create more air bubbles in the batter.
- Use room temperature cream cheese so it is easier to soften it and the cheese will not curdle.
- Mix the eggs one at a time, putting the next only after the batter is just incorporated.
- Only mix each ingredient until just combined. Do not overmix as not to create lots of air bubbles.
- Tap the baking pan a few times to let the air bubbles come out before baking.
- Let the cheesecake cool down before putting it in the refrigerator.


I love how easy it is to make this creamy cheese cake. It is super delicious and you can adjust the texture.