

Coffee Bun Recipe with Crunchy Coffee Crust & Butter Filling
 This post may contain affiliate links.
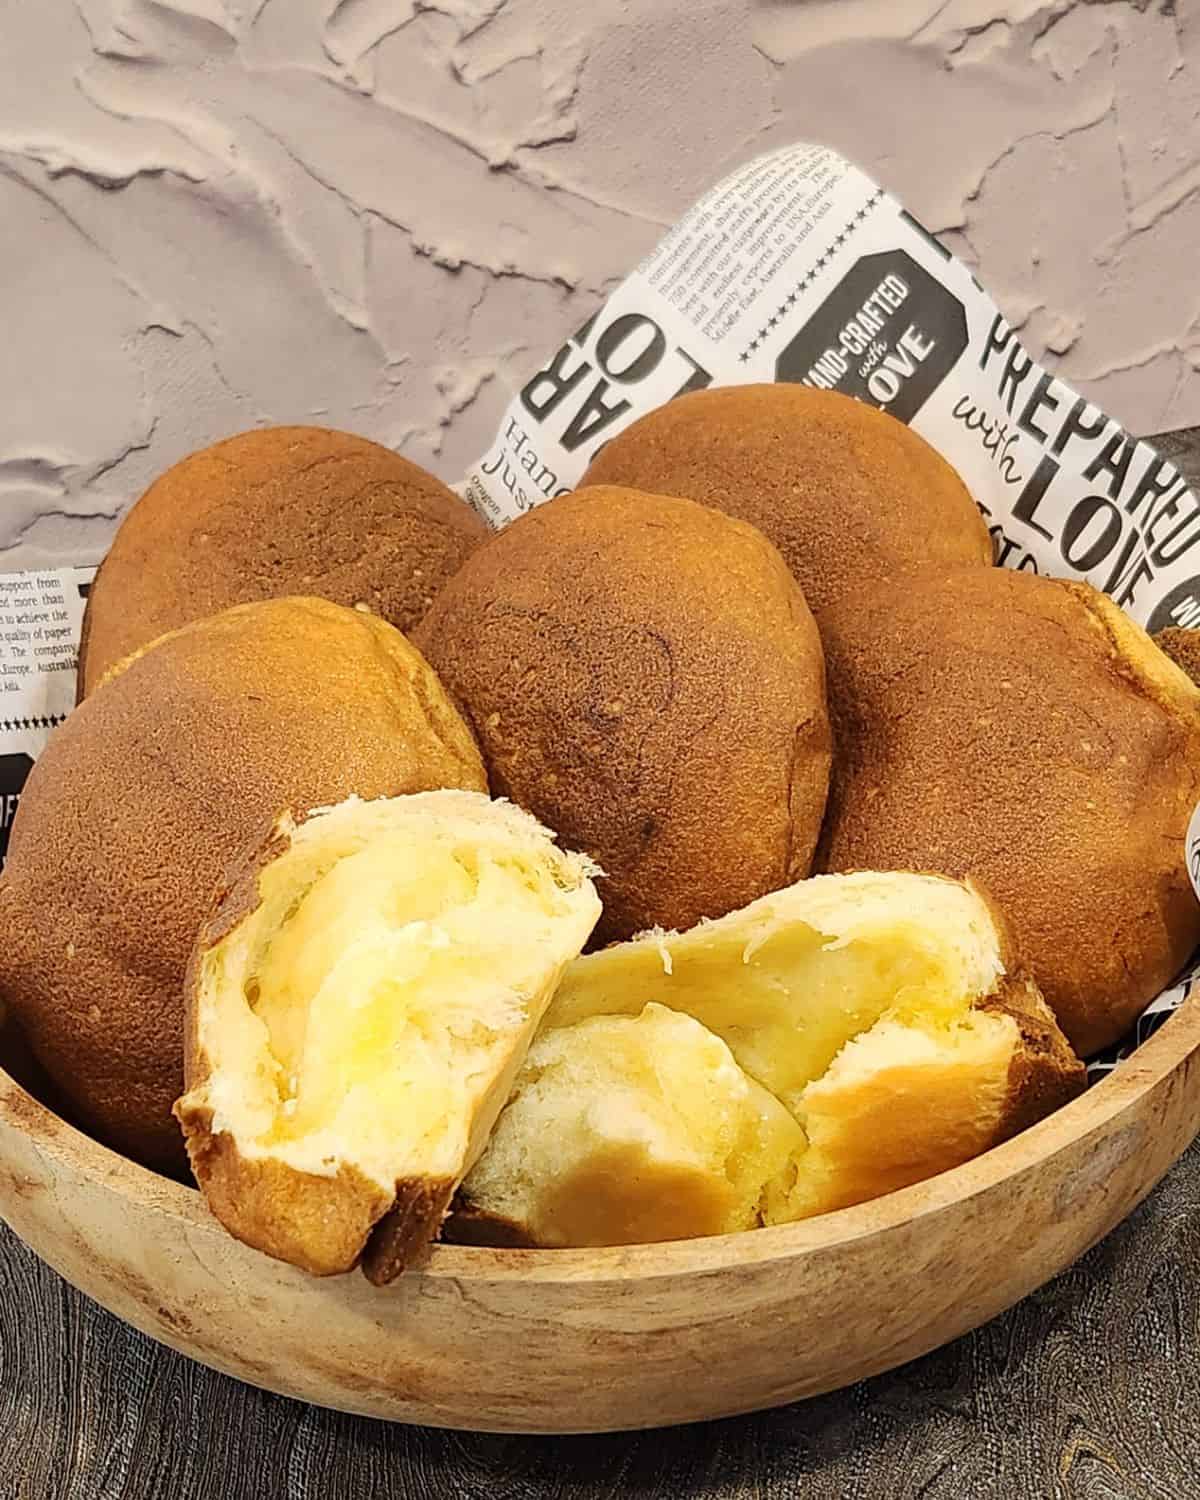
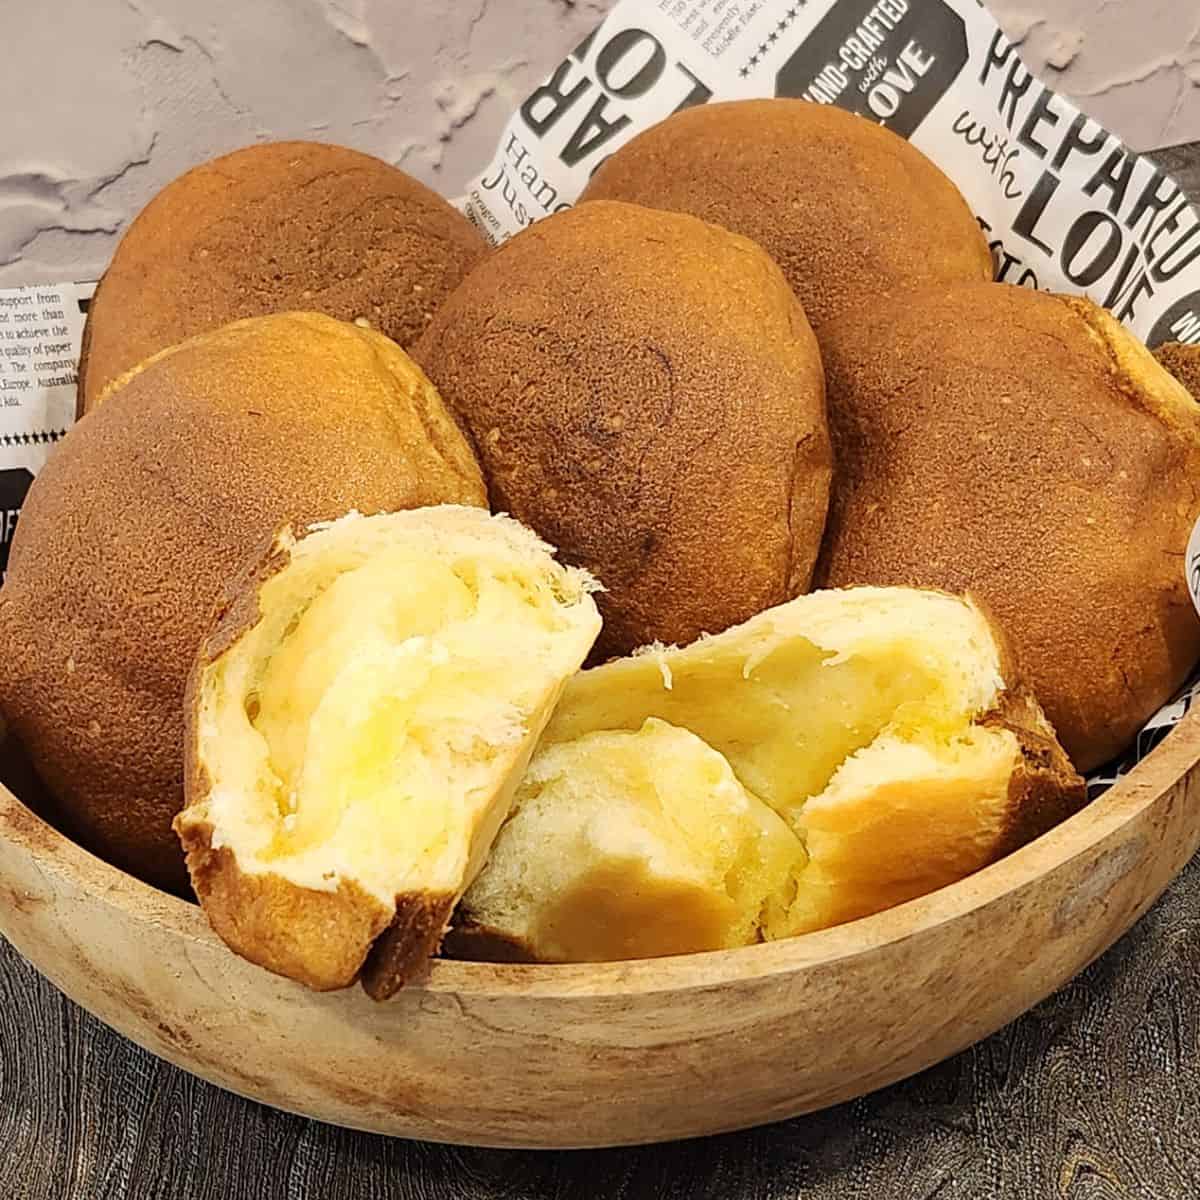
These coffee buns are one of my husband’s favorite breads, and I can see why. Each bun is soft and fluffy inside, filled with salted butter, and covered with a crisp coffee cookie crust that smells amazing as it bakes.
A Quick Look at the Recipe
🏷️ Recipe Name: Coffee Bun
⏱️ Ready In: ~ 2 hour 30 minutes
🍽️ Serves: 6 pieces
🔥 Calories: 350 kcal per serving (estimate)
🧾 Main Ingredients: Bread flour, milk powder, sugar, instant yeast, egg, unsalted butter, salt, salted butter, instant coffee, all purpose flour, powdered sugar.
🥗 Dietary Info: Contains dairy and gluten
🧠 Difficulty: Easy with step-by-step guide
Have a question? Ask AI!
This coffee bun is one of my husband’s favorite breads, so it is something I have baked many times at home. The combination is hard to resist: a soft, fluffy bun with salted butter hidden inside, topped with a thin coffee cookie layer that bakes into a crisp, fragrant crust.
You may also know this bread as a Mexican coffee bun, Papparoti, or Roti Boy-style bun. Despite the “Mexican” name, this style of coffee bun has become especially popular across Asia, where it is commonly sold in bakeries and shopping malls. The contrast between the crunchy coffee topping and the buttery bread underneath is what makes it so memorable.
If you enjoy soft Asian bakery-style breads, you may also like my anpan bread, salt bread, or Korean sausage bread. Each one has a different filling or topping, but they all have that soft, tender texture that makes homemade Asian bread so satisfying to bake.
If you love baking breads like these, you can find more ideas in my Asian Bread Recipes collection, including soft buns, filled breads, and other bakery-style favorites.
Why You Will Love This Recipe
Recipe Ingredients

Ingredient Notes
Salted butter – Cut the butter into small squares for the filling and keep them chilled in the refrigerator until you are ready to shape the buns. Cold butter is easier to wrap inside the dough and is less likely to melt before baking.
Instant coffee powder – This gives the cookie topping its distinct coffee aroma and flavor. Dissolve it in the hot water before mixing it into the topping so the coffee distributes evenly.
Powdered sugar – Use powdered sugar for the coffee topping rather than granulated sugar. It blends smoothly with the butter and helps create that thin, crisp cookie-like crust.
Egg – Lightly beat the egg first, then divide it into two portions. Use the first half for the bread dough and reserve the second half for the coffee topping.
Unsalted butter – You’ll notice there are two types of butter in the recipe. I use unsalted butter in both the bread dough and coffee topping so I can control the saltiness, while salted butter is reserved for the filling.
How to Make Coffee Buns

STEP 1. Make the dough. Sift the bread flour and milk powder into the mixing bowl. Add the sugar, instant yeast, half of the beaten egg, and water (Image 1). Attach the dough hook and begin mixing (Image 2). Once the ingredients come together into a rough dough, add the unsalted butter and salt (Image 3). Continue kneading until the dough becomes smooth and elastic, about 17 minutes in my mixer. Check the dough with the windowpane test—it should stretch into a thin, translucent membrane without tearing easily (Image 4).
Take one portion and flatten it gently with your hand. Roll it out with a rolling pin, flip it over, and roll again (Image 8). Place one piece of cold salted butter in the center (Image 9). Bring the edges of the dough toward the center and pinch firmly to seal the butter inside (Image 10). Repeat with the remaining dough.

STEP 2. First proof and shape the buns. Shape the dough into a smooth ball and place it in a bowl (Image 5). Cover with plastic wrap to prevent the surface from drying out, then let it rise for about 1 hour, or until doubled in size. Gently press the dough to release the excess air (Image 6). Divide it into 6 equal portions, shape each portion into a ball, and cover with plastic wrap (Image 7). Let the dough rest for 10 minutes.

STEP 3. Second proof and add the coffee topping. Arrange the shaped buns on a lined baking tray and cover loosely with plastic wrap (Image 11). Let them rise again for about 40 minutes, or until noticeably puffy and close to doubled in size (Image 12). Meanwhile, prepare the coffee topping (see the coffee topping instructions below). Pipe the topping in a spiral, starting from the center and working outward (Images 13, 14).
Bake in a preheated 356°F (180°C) oven for 16–20 minutes, or until the tops are deeply golden and crisp.

STEP 4. Cool the buns. Once baked, the coffee topping should form a crisp crust over the surface of the buns (Image 15). Transfer the buns to a cooling rack and let them cool slightly.

STEP 5. Serve warm. For the best texture, enjoy the coffee buns while still warm. When you tear one open, the bread should be soft and fluffy, with the salted butter melted inside (Image 16).
Make the Coffee Topping

Dissolve the instant coffee powder in the hot water in a mixing bowl (Image A). Add the unsalted butter and mix until well combined (Image B). Add the reserved half of the beaten egg and mix again until smooth (Image C).
Add the powdered sugar and all-purpose flour (Image D), then mix until you have a smooth, creamy coffee topping (Image E). Transfer the mixture to a piping bag (Image F) and set aside until ready to use.
Pro Tips
- Knead until the dough passes the windowpane test. The dough should stretch thin enough to become almost translucent without tearing easily. This is a better guide than relying only on the mixing time.
- Keep the salted butter cold. Leave the butter cubes in the refrigerator until you are ready to fill the buns. Cold butter is easier to wrap and less likely to leak out during shaping.
- Seal the dough very well. After placing the butter in the center, pinch the dough firmly closed. A loose seam can allow the butter to escape while baking.
- Do not skip the resting time after dividing the dough. Letting the dough rest for about 10 minutes relaxes the gluten, making each portion much easier to roll and shape.
- Keep the dough covered while it rests and proofs. Plastic wrap helps prevent the surface from drying out and forming a skin, which can make shaping more difficult.
- Pipe the coffee topping from the center outward. Make a spiral over the top of each bun so the topping can spread evenly as it bakes and form that signature crisp coffee crust.
Serving Suggestions
These coffee buns are best enjoyed warm, when the coffee topping is still crisp and the salted butter inside is soft and melty. They make such a nice after-school snack or afternoon treat, especially with a cold glass of watermelon juice, cucumber juice, or pineapple mint soda. If you want to turn it into a little snack spread, add some coffee bean cookies, coconut kaya jam, or custard filling on the side.
If you feel like making them a little more special, serve them with some coconut kaya jam or custard filling on the side. The creamy sweetness goes really well with the coffee flavor and buttery center.
Coffee Bun FAQs
A coffee bun is a soft, fluffy bread filled with butter and topped with a coffee-flavored cookie crust that becomes crisp as it bakes.
They are very similar styles of bread. Coffee buns are often associated with names such as PappaRoti, Roti Boy, or Mexican coffee buns, although recipes can vary slightly by bakery or brand.
This can happen if the topping is too wet, the oven is not fully preheated, or the buns are underbaked. Make sure the topping has a smooth, pipeable consistency and bake until the crust is nicely golden.
Yes. You can knead the dough by hand, although it will take more time and effort. Knead until the dough is smooth, elastic, and able to pass the windowpane test.
The most common reason is that the dough was not sealed tightly enough around the butter. Keep the butter cold and pinch the seam firmly closed before the second proof.
Yes. You can knead the dough by hand, although it will take more time and effort. Knead until the dough is smooth, elastic, and able to pass the windowpane test.

Storage
Store leftover coffee buns in an airtight container or wrap them individually in plastic bags at room temperature for up to 2 days. For longer storage, keep them in the refrigerator.
To reheat, warm the buns briefly in the microwave if you just want them soft, or use the oven for a few minutes to bring back the crispy coffee topping. The oven is the better choice if you want that freshly baked texture again.
More Asian Bread Recipes
If you enjoy soft, bakery-style breads like these coffee buns, here are a few more Asian bread recipes you may want to try next.
- Beef Floss Bread Roll
- Melon Pan
- Japanese Milk Hearth Bread
- Chocolate Milk Hearth Bread
- Pumpkin Bread with Coconut Filling
Coffee Bun
Equipment
Ingredients
- 230 gr bread flour
- 10 gr milk powder
- 35 gr sugar
- 4 gr instant yeast
- ½ egg
- 110 ml water
- 30 gr butter unsalted
- 3 gr salt
Filing
- 30 gr salted butter divide into 5 gr each
Coffee Topping
- 3 gr instant coffee powder
- 5 ml water hot
- ½ egg
- 35 gr powdered sugar
- 40 gr all purpose flour
- 40 gr butter unsalted
Instructions
- Sift the bread flour and milk powder into the mixing bowl. Add the sugar, instant yeast, half of the beaten egg, and water (Image 1). Attach the dough hook and begin mixing (Image 2). Once the ingredients come together into a rough dough, add the unsalted butter and salt (Image 3). Continue kneading until the dough becomes smooth and elastic, about 17 minutes in my mixer. Check the dough with the windowpane test—it should stretch into a thin, translucent membrane without tearing easily (Image 4).
- Take one portion and flatten it gently with your hand. Roll it out with a rolling pin, flip it over, and roll again (Image 8). Place one piece of cold salted butter in the center (Image 9). Bring the edges of the dough toward the center and pinch firmly to seal the butter inside (Image 10). Repeat with the remaining dough.
- Shape the dough into a smooth ball and place it in a bowl (Image 5). Cover with plastic wrap to prevent the surface from drying out, then let it rise for about 1 hour, or until doubled in size. Gently press the dough to release the excess air (Image 6). Divide it into 6 equal portions, shape each portion into a ball, and cover with plastic wrap (Image 7). Let the dough rest for 10 minutes.
- Arrange the shaped buns on a lined baking tray and cover loosely with plastic wrap (Image 11). Let them rise again for about 40 minutes, or until noticeably puffy and close to doubled in size (Image 12). Meanwhile, prepare the coffee topping (see the coffee topping instructions below). Pipe the topping in a spiral, starting from the center and working outward (Images 13, 14).
- Bake in a preheated 356°F (180°C) oven for 16–20 minutes, or until the tops are deeply golden and crisp.
- Once baked, the coffee topping should form a crisp crust over the surface of the buns (Image 15). Transfer the buns to a cooling rack and let them cool slightly.
- For the best texture, enjoy the coffee buns while still warm. When you tear one open, the bread should be soft and fluffy, with the salted butter melted inside (Image 16).
Coffee Topping
- Dissolve the instant coffee powder in the hot water in a mixing bowl (Image A). Add the unsalted butter and mix until well combined (Image B). Add the reserved half of the beaten egg and mix again until smooth (Image C).
- Add the powdered sugar and all-purpose flour (Image D), then mix until you have a smooth, creamy coffee topping (Image E). Transfer the mixture to a piping bag (Image F) and set aside until ready to use.
Notes
- Knead until the dough passes the windowpane test. The dough should stretch thin enough to become almost translucent without tearing easily. This is a better guide than relying only on the mixing time.
- Keep the salted butter cold. Leave the butter cubes in the refrigerator until you are ready to fill the buns. Cold butter is easier to wrap and less likely to leak out during shaping.
- Seal the dough very well. After placing the butter in the center, pinch the dough firmly closed. A loose seam can allow the butter to escape while baking.
- Do not skip the resting time after dividing the dough. Letting the dough rest for about 10 minutes relaxes the gluten, making each portion much easier to roll and shape.
- Keep the dough covered while it rests and proofs. Plastic wrap helps prevent the surface from drying out and forming a skin, which can make shaping more difficult.
- Pipe the coffee topping from the center outward. Make a spiral over the top of each bun so the topping can spread evenly as it bakes and form that signature crisp coffee crust.


One of my husband’s favorite breads! Soft coffee buns with a crispy topping and melted salted butter inside.